Yes, it is I, Sherry The Mediocre Seamstress, back with another post about sewing something while half wanting to fling the machine out the window, and then acting like a triumphant American Gladiator when I’m finished, parading around all sweaty and half clothed in full peacock mode. Behold, I have transformed one boy’s duvet cover into two.
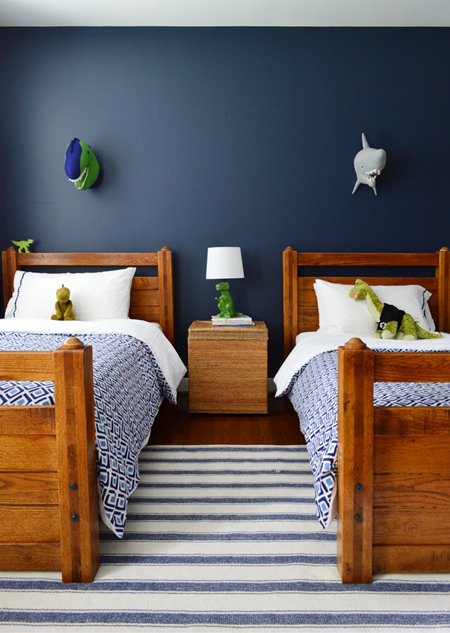
The issue was simple: my BFF had inherited her husband’s boyhood set of twin beds for their son’s bedroom. They had been using just one in their old house, but now had room to set up both in their new house (which is just a block away from mine! INSERT ALL THE EXCITED EMOJIS!).
But alas, she had only one duvet cover (from Garnet Hill a few years back) and it was no longer for sale. So to get a matching set, she assumed she’d have to buy two new ones. Then I swooped in with waaaay too much enthusiasm and basically begged her to let me take the original duvet cover apart and see if I could turn it into two duvet covers. If I failed, well, she was planning to buy a new matching set anyway. And if I succeeded, well… I could feel like I was finally earning my keep after all the delicious meals and root beer floats she has been stuffing into my pie hole since we met 16 years ago in a tiny NYC dorm room.
Step One: Get cocky, quickly followed by an enveloping sense of dread. Because it’s going to freak you out to clip your friend’s property in half. Even if she’s laughing and taking an iPhone pic while it all goes down.
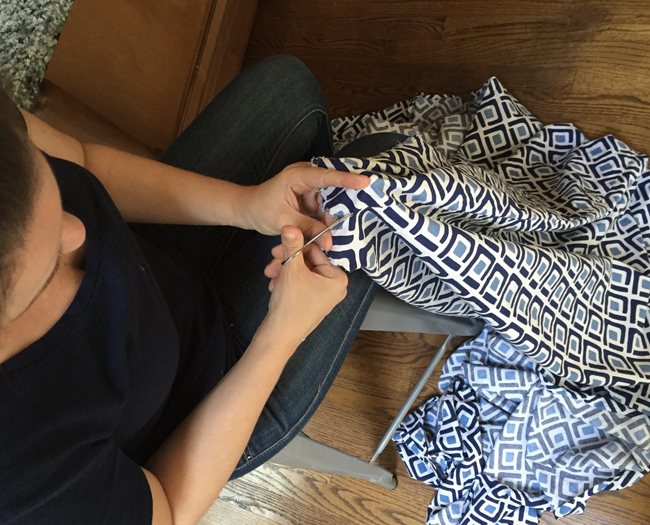
Basically I perched on her kitchen stool and used baby scissors to slowly work my way around the perimeter, just clipping the little threads that hold the front side of the duvet cover to its back side (I didn’t actually cut any of the fabric). Much like a seam ripper, this worked slowly but surely, and soon enough I was left with two almost identical sides (one had button holes and one had buttons, but otherwise they were the same).
Obviously, the duvet cover has to have the same patterned or colored fabric on both sides for this to work (essentially, you’re dividing it and then marrying each to a large flat sheet in the color of your choice). We went with white cotton flat sheets, which I grabbed at Target for $8 each. The key is to match the fabric type whenever possible (sewing two 100% cotton sheets together without any stretch makes for a more cohesive duvet without any puckering) and then just choose a color that works with your pattern or color.
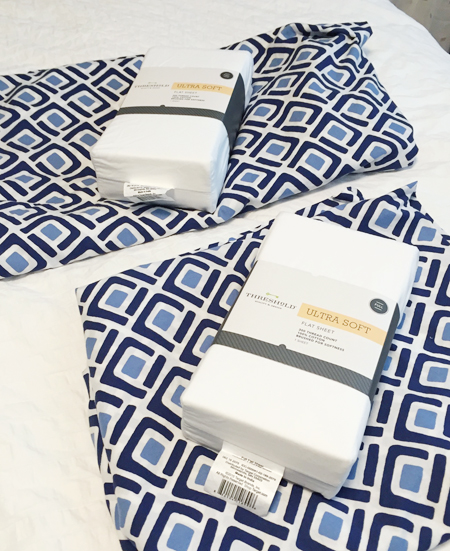
Oh and get the flat sheets a size up from your duvet. I got full-sized sheets for these twin-sized duvet panels because the sheet needs to be AT LEAST as wide and as long as the duvet cover panel, or it’s going to look majorly wonked.
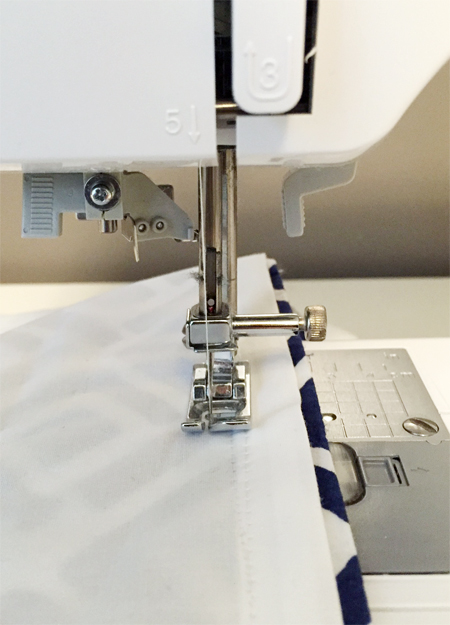
Step Two: Lay out the flat sheet with the duvet cover panel on top and trim the sheet to be the same size as the duvet cover, leaving an extra inch around any side that you are cutting, which will probably be 2 of the 4 sides (the other two won’t have a cut edge because they’ll maintain their original hemmed edge). That extra inch on those two sides is so you can hem/finish them for a clean look and to prevent fraying (just fold over the last inch of fabric on that side and stitch that fold in place with your machine). You’ll want to hem any cut sides BEFORE you join the sheet to the duvet cover.
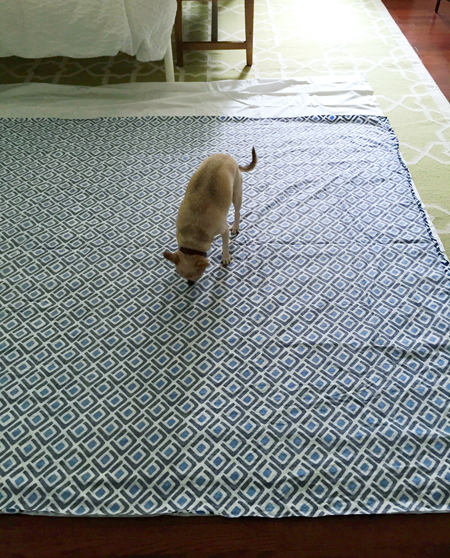
Feel free to have a chihuahua inspect your work as you go.
Step Three: You’ll then want to stitch THREE out of four of your duvet cover sides back together (all but the short side that has existing buttons or button holes from the original duvet cover). But you want to do this INSIDE OUT, so your seams are hidden inside when it’s right side out. I basically placed the duvet cover pattern-side-up on the machine and then laid the white sheet face-down against it (making sure I was lining up the sides that are the same size with each other).
You’ll essentially be left with a GIANT PILLOWCASE, which will look amazingly clean and neat when you turn it right side out (even if your lines aren’t perfectly straight, the duvet insert will fluff in there and all will be forgiven). But what do you do with that open end? You know, the one that stays open so you can stuff the duvet insert in there? Hmmm…
Step Four: Feel your anxiety ratchet up, but then investigate the situation. The original duvet cover had left only about 1/3rd of that side open in the middle, so I turned everything back inside out again and sewed those outer corners together the same way I had done the other three sides, leaving just the middle third of the duvet cover gaping open.
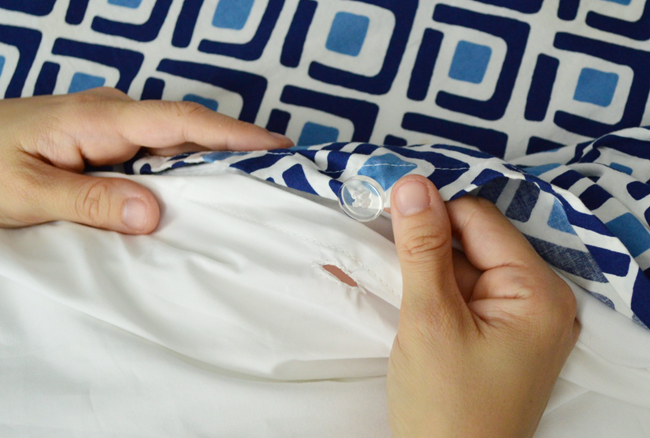
Step Five: The original duvet cover had used buttons to close the gap, so it meant by splitting them apart I had one cover with buttons (but no holes) and another with holes (but no buttons). So on the latter, I just sewed these brown buttons onto the white side wherever there was an existing button hole on the patterned side. A moment of silence for John’s old pair of cargo shorts that heroically donated these buttons.
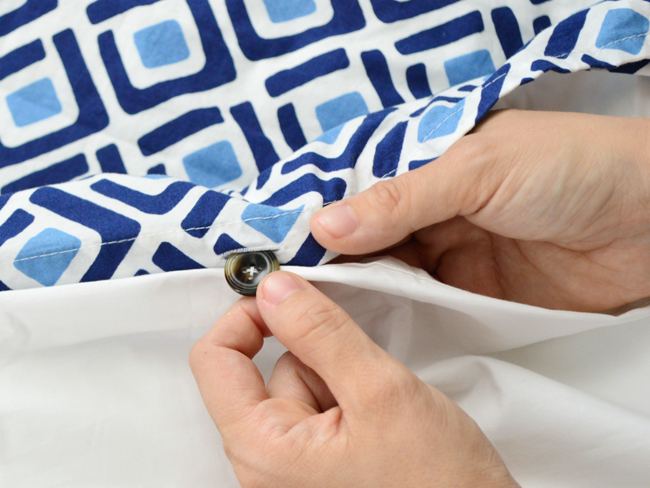
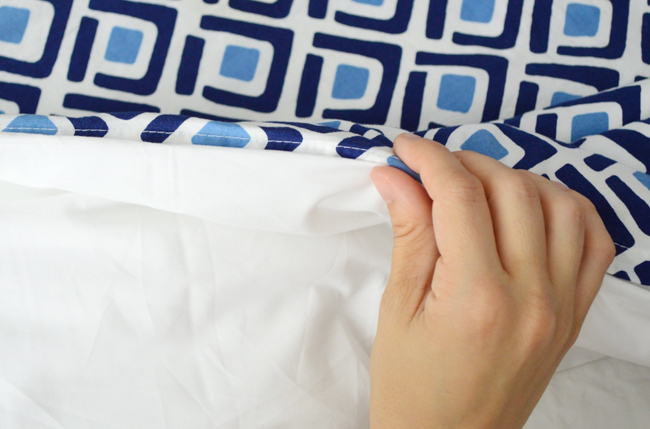
Oh, and the trick here was to sew the buttons on the INSIDE hem of the white sheet, that way you can button it in a way where the duvet cover sort of folds over itself to hide the buttons. I feel like that’s weird to explain / show, but if you’ve ever had a duvet cover like this you’ll know what I mean. The buttons and holes basically hide themselves so it looks like this when you button it:
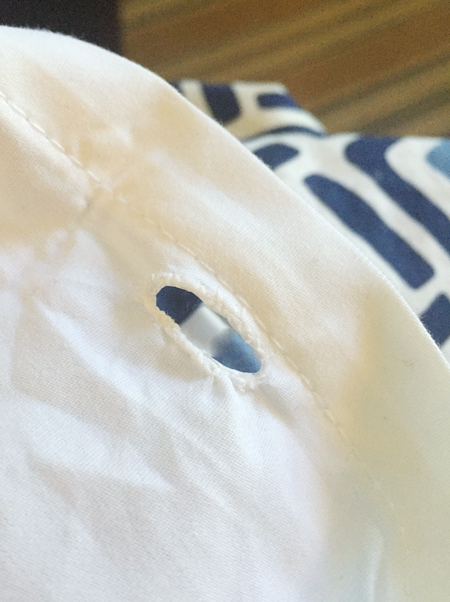
Step Six: Now the other duvet cover (the one with buttons, no holes) scared me a little more. I had never made a button hole before, so I just winged it after staring at the “pro button holes” on the finished duvet cover I had just completed (side note: I really hope someone finds this post by Googling “pro button holes”). It appeared as if someone had just made a small slit in the fabric and then did a bunch of little knotted loops of string around all sides of the opening so it wouldn’t fray or rip over time. I’m sure there’s a fancy term for that kind of stitch. Maybe knotted whipstitch?

So after I made my little slit I basically just did tons and tons of looped knots around the entire perimeter (I went around it a few times over to make sure it was all nice and covered so it hopefully wouldn’t have a bunch of frayed strings sticking out after one washing). They weren’t nearly as lovely as the pro button holes (#SEO)…
… but they worked like a charm. And once the buttons were tucked into the holes, well, the buttonholed duvet cover looked just as good as the buttoned duvet cover – which was a giant relief since there were more than a few moments of doubt.
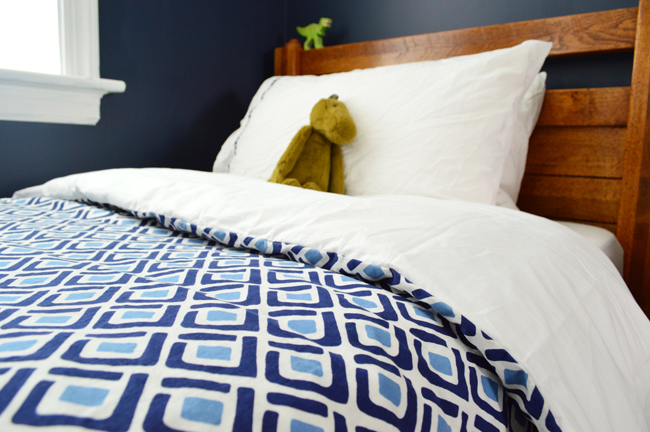
So that’s how this girl (points to self with thumbs while grinning the grinchiest grin you’ve ever seen) made one duvet cover into two – all without actually launching the sewing machine out the window. Not gonna lie, there were a few threats of that happening, but it’s is still sitting pretty in the guest room.
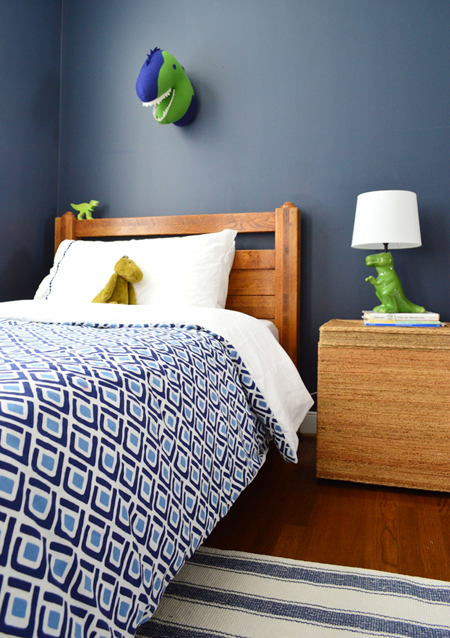
Also, in case it wasn’t clear from the photos, her son IS OBSESSED WITH DINOSAURS. As in, he can name like 10,000 and thinks I’m hilarious when I say things like “oh is that a brontosaurus?” (“no Aunt Sherry, that’s a brachiosaurus! And this is an apatosaurus and this is a plesiosaurus!”).
And aside from grabbing those playful little shark and dino wall heads and a new T-Rex lamp, the M.O. of the room so far is just trying to use what they already have – like their existing rug and an old woven side table as the nightstand. And I’m happy to have helped by magically (if by magically, you mean semi-nervously and sweat-i-ly) turning one lonely duvet into a matching set.
To check out more of my love/hate fueled posts about sewing, here’s how I:
- sewed a patchwork quilt for my daughter
- made a little stitched quilt for my son a few years later
- sewed a beanbag pouf (Burger is hilarious in these pics)
- made curtain panels for the dining room (it’s easy!)
- used two cloth napkins to make accent pillows
- made a drapey pom-pom-fringed canopy over our daugher’s bed
*This post contains affiliate links
The post How To Turn One Duvet Cover Into Two appeared first on Young House Love.
No comments:
Post a Comment