Looking for a small home in the Grand Canyon State? You came to the right place. 10. The Vintage Model Price: $57,500 Location: Lakeside Square Footage: 384 Portable on pressure treated skids, this home can be moved anywhere you’d want to go. All the customary features for a contemporary lifestyle are included. 9. THOW in […]
Friday, September 30, 2016
Thursday, September 29, 2016
All Aboard the Web Express with Ben McKinley
This week we interview THE guy who gets to work in THE coolest, funkiest, most fun, most creative, and most hipsterish workplace in all of Portland. If you’re a fan of all things tiny, and unique; you’ll want to hear all about Ben’s adventures while permitting, remodeling, moving and then moving into three rail cars […]
Wednesday, September 28, 2016
When Yesterday Makes Today Disappear
“The difference between sentiment and being sentimental is the following: Sentiment is when a driver swerves out of the way to avoid hitting a rabbit on the road. Being sentimental is when the same driver, when swerving away from the rabbit, hits a pedestrian.” ~ Frank Herbert The conversation of minimalism and living in a […]
Tuesday, September 27, 2016
A Tiny House Designer, Dweller and Advocate
The illustrious Vina Lustado of Sol Haus Design and the Tiny House Collaborative is an incredibly talented and humble tiny house designer, builder, dweller and advocate. Not only have her sustainable tiny house designs gone around the world, she has help lead up major advocacy efforts in Ojai, CA. In fact, Ojai is on the […]
Monday, September 26, 2016
A Large House Plant That’s Easier Than A Fiddle Leaf Fig
Big leafy house plants. If they’re large and healthy looking they can make the room and we’ve all seen the glossy magazine shots to prove it. They can also ruin your day if you pay a lot for one that later croaks, leaving you feeling like a good-for-nothing plant killer. But not only have I managed to keep my big plants (mostly) alive – I’ve found a new favorite that’s super easy.
First, let’s talk about the fiddle leaf fig. We, like 99.9% of blogland, have fallen hard for them. We’ve got two that have been happily cohabitating with us for years: one tall guy that resides in the office and a bushier one in the dining room. They’ve not only survived, but we’ve even achieved new growth on them. It feels kind of like winning an imaginary fiddle-leaf shaped award made of solid gold (“I’d like to thank the academy, er, nursery”).
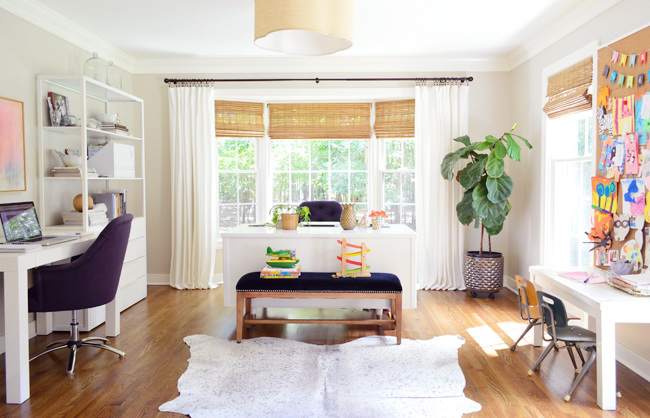
My secret recipe isn’t earth shattering: find a nice sunny spot, don’t move it (ever!), and then dump 2-3 cups of water on it every 10 days or so. I also close the air vent if there’s one right next to it, since this office guy didn’t look very perky with the heat blowing on him all winter. With that care “regimen,” they generally seem thrilled (well, as thrilled as a plant can be).
We had a third in the living room for a little while, but, how can I put this delicately… he didn’t exactly thrive in that corner which tends to get a lot less light thanks to the overhang of the back porch. This is an old shot taken over a year ago for our second book, back when the plant was new and happy and hadn’t yet become bedraggled and downtrodden.
In our two sunniest rooms, the office and dining room, they’ve been great – which is precisely why I’m convinced that lighting/location is EVERYTHING for them. That and not getting moved once they find their happy place. We tried to resuscitate that living room guy after he’d dropped half his leaves by moving him into our sunny home office – but alas, it was too late (also, they hate being moved). Fade up on the Sarah McLachlan music for Fig #3.
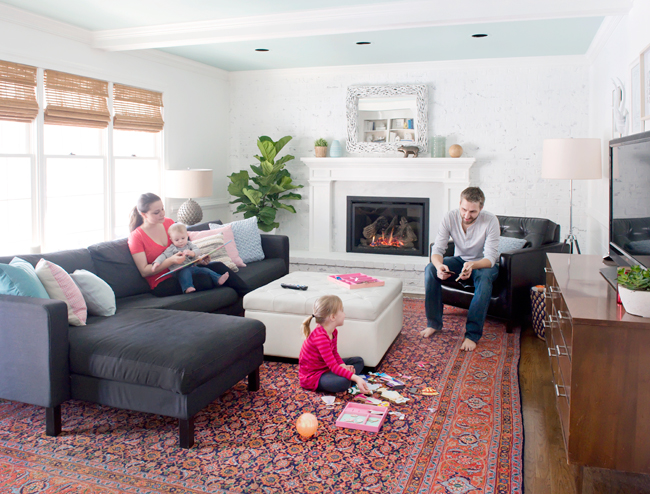
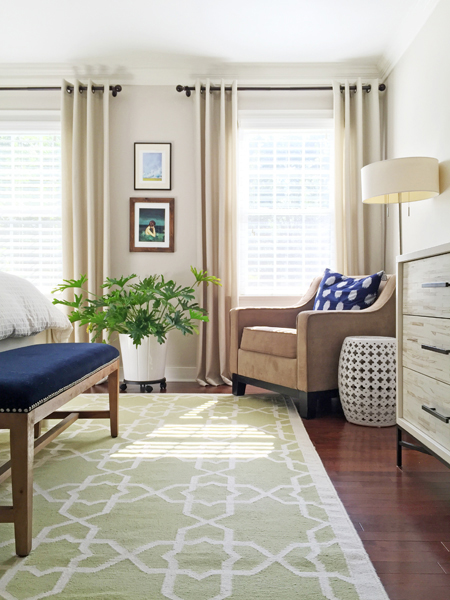
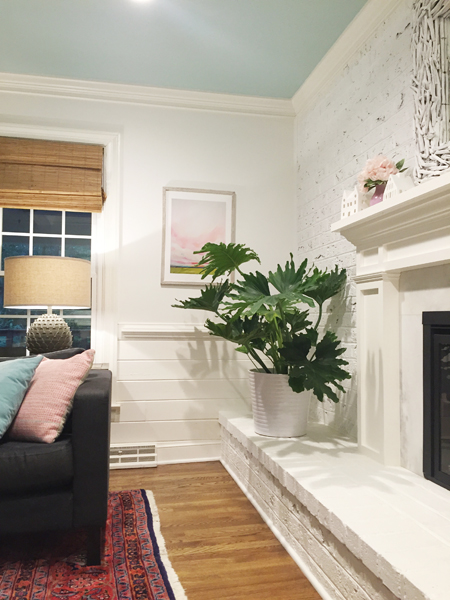
But our living room plant story has a happy ending. Enter my new favorite plant, stage left: the Hope Philodendron. I mentioned them a few podcast episodes ago (Episode #9) after bring two home, one for the living room and then one for our master bedroom.
Here’s why I’m loving them:
- The nice big ones tend to be significantly cheaper than fiddle leaf figs (both of mine came in big 10- 12″ pots and were under $24 – here’s one on Amazon for $18, whereas I think we paid $49 for our figs)
- They’re easier to find, since fiddle leaf figs seem to sell out quickly most places around here
- They’ve proven to be less picky about lighting (thriving equally well in our sunny bedroom and our dim living room)
- They don’t feel quite as ubiquitous as the fiddle leaf fig (they’re like his mysterious younger brother)
- They still make a large leafy statement in a room, even if they’re more bushy & less tree-like
Philodendrons come in a bunch of different varieties (their leaves can be smaller, rounder, more like a palm leaf, etc) but we have been drawn to this particular type called Hope (a fitting name, since it gives hope to black thumbs everywhere). Sometimes a nursery or plant store won’t mark philodendron varieties specifically, so you may need to ask for a Hope specifically (or look closely for leaves that resemble the ones below).
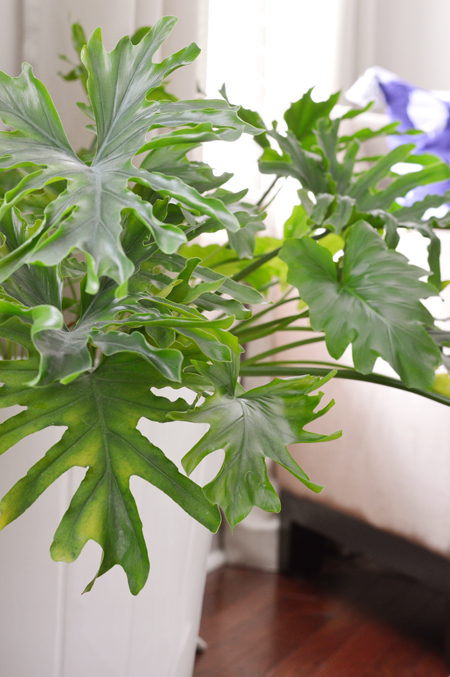
Since this variety is said to do better in lower light areas, it’s a great alternative for a big, statement plant in rooms that won’t support a fiddle leaf fig. I just water ours with a cup or two of water once a week and they’ve been more than happy. They’ve actually grow quite a bit, so we’ve had to cut back a couple of long stalks.
So if you’re looking for something with large sculptural leaves and some serious presence in a room, we highly recommend the Hope Philodendron. They’re everything I love about my two (surviving) fiddle leaf figs, just in a less persnickety package.
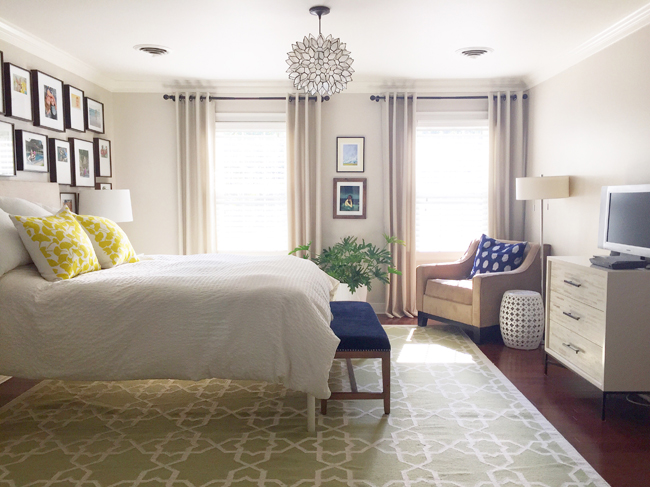
And on the subject of big plants: dude, we got a kumquat tree. And it GREW A FRIGGIN’ KUMQUAT! We put it next to a side window in our bedroom that gets a fair amount of light and this happy orange fruit started growing right before our eyes.
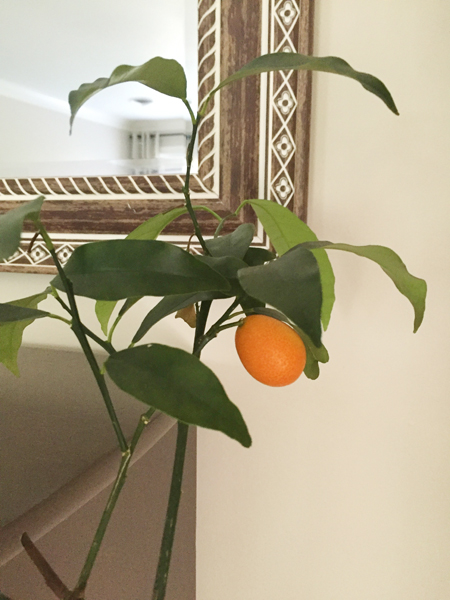
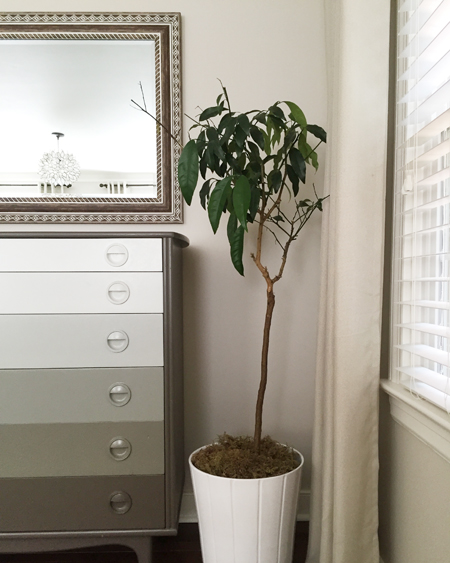
But fasten your seat belts, this story has a twist. Someone under the age of 7 plucked it off (the exact culprit has yet to come forward). I was sad for a second but then I realized “hey it’s going to grow another one, so it’s all good!” And then as if in protest, our little kumquat tree slowly declined – dropping some leaves and generally just looking bedraggled. There’s no new fruit to be seen – even though the kumquat-plucking incident occurred around three months ago.
I don’t think the decline has much to do with The Plucking Of The Kumquat (I mean people pick fruit off trees all the time and they’re ok, right?). I’m convinced it just has to do with this plant being a bit finickier than I’m used to. I did a little reading up on them, and it says they prefer indirect light and need some-but-not-too-much water (I give it around one cup once a week and occasionally lift the plastic pot out of the ceramic planter that it sits in the make sure there’s no standing water in the bottom).
Once he bites the dust, we may give another fiddle leaf fig a go up there since it’s a pretty bright spot and we’ve already checked the Hope Philodendron box in that room. Maybe we just haven’t graduated to fruit-bearing plant status yet? Maybe we should stick with easy (Hope Philodendron) to medium difficulty (fiddle leaf fig) for our big statement house plants.
Incidentally, two different people at two different nurseries have told me that house plants generally don’t do well when you repot them right after you buy them. They both said to just leave them in the plastic pot they come in if they’re happy and just drop that into a ceramic planter. Perhaps down the line they’ll grow so much that they need to be repotted, but don’t rush to do that. So that’s what we did with all of ours mentioned here, and they seem to be ok with it.
Warning: The philodendron is listed as being toxic to both cats and dogs (as is the fiddle leaf fig) so wouldn’t recommend them if you have pets that eat your plants. I’d also avoid them if you have kids who do that. The kumquat tree is listed as safe for humans, but dangerous for horses (?!) and apparently if a dog eats a ton of leaves/wood from it, it can have a laxative effect. So probably not very good if your dog is into leaf gorging or bark gnawing.
Psst- For anyone who listened to this week’s podcast (Ep #17) and heard about our kitchen reno, I know you’re reading this and thinking “WHY ARE YOU TALKING ABOUT PLANTS WHEN YOUR KITCHEN PICS COULD BE HERE?!” Well, we’re editing them and putting together a post as you read this (assuming you’re reading this at 11:49 pm on Monday night) so that’s in the pipeline for ya!
*This post contains affiliate links
The post A Large House Plant That’s Easier Than A Fiddle Leaf Fig appeared first on Young House Love.
Book a Stay in Chattanooga’s Live a Little Tiny Houses
Several eclectic and cozy designs are now available for rent from the Live a Little Chatt. company in Chattanooga, Tennessee. Located at the base of Lookout Mountain, the tiny houses are available for rent on Airbnb and give a interesting look into some new designs. Live a Little Chatt. offers several tiny homes (and a cave […]
Friday, September 23, 2016
Village for Sale in Spain
Why settle for a tiny house, when you can have a whole tiny town? It may not be as crazy as it sounds… All along the northern coast of Spain are quaint little villages among the verdant hills of Galicia, a rocky coastal region known for its fishing trade and animal husbandry. Quaint little homes made […]
Thursday, September 22, 2016
Living With Our Family in a Tiny House Jamboree Special Episode #3
The tiny house movement is pretty big, and growing. And, within the movement is a much smaller subset of people who actually live in tiny houses. But, and rarer still, are the families who live in tiny houses. We were thrilled to actually capture Macy Miller and Kim Kasl at the Jamboree for long enough […]
Wednesday, September 21, 2016
Is Tinier Even A Word?
800 square feet. You can dance in it. You can laugh in it. You can eat in it. You can sleep in it. You can do a forward roll in it and you can curl up and cry in it. 200 square feet. You can dance in it. You can laugh in it. You can eat […]
Tuesday, September 20, 2016
Fall Tiny House Workshop with Dee Williams from PAD Tiny Houses
Do you want to learn all the technical design and construction information you need to build your tiny house on wheels from an experienced teacher in a supportive and fun setting? Then check out PAD Tiny Houses’ upcoming Tiny House Workshop in Portland, Oregon on November 12-13, 2016. PAD’s workshops are led by tiny house […]
Tiny House Semi Trailer Conversion
My heart is to create cool, affordable housing for single parents or those wishing to get out of debt and live simply. My father (who is really awesome) and I set out 8 weeks ago and our first prototype is completed. I do have the freedom to share now that “Tiny House Hunters” on HGTV […]
Monday, September 19, 2016
How To Turn One Duvet Cover Into Two
Yes, it is I, Sherry The Mediocre Seamstress, back with another post about sewing something while half wanting to fling the machine out the window, and then acting like a triumphant American Gladiator when I’m finished, parading around all sweaty and half clothed in full peacock mode. Behold, I have transformed one boy’s duvet cover into two.
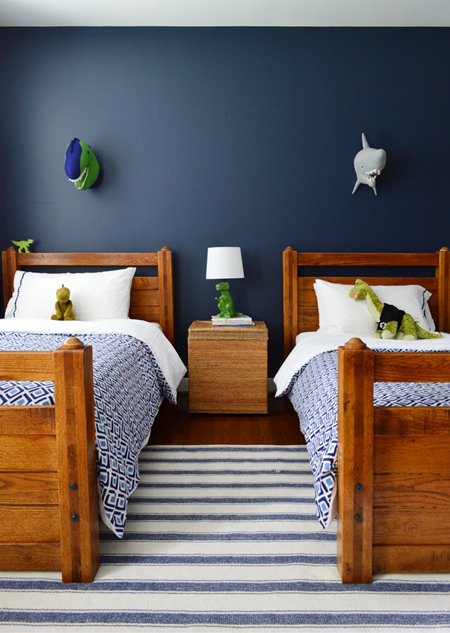
The issue was simple: my BFF had inherited her husband’s boyhood set of twin beds for their son’s bedroom. They had been using just one in their old house, but now had room to set up both in their new house (which is just a block away from mine! INSERT ALL THE EXCITED EMOJIS!).
But alas, she had only one duvet cover (from Garnet Hill a few years back) and it was no longer for sale. So to get a matching set, she assumed she’d have to buy two new ones. Then I swooped in with waaaay too much enthusiasm and basically begged her to let me take the original duvet cover apart and see if I could turn it into two duvet covers. If I failed, well, she was planning to buy a new matching set anyway. And if I succeeded, well… I could feel like I was finally earning my keep after all the delicious meals and root beer floats she has been stuffing into my pie hole since we met 16 years ago in a tiny NYC dorm room.
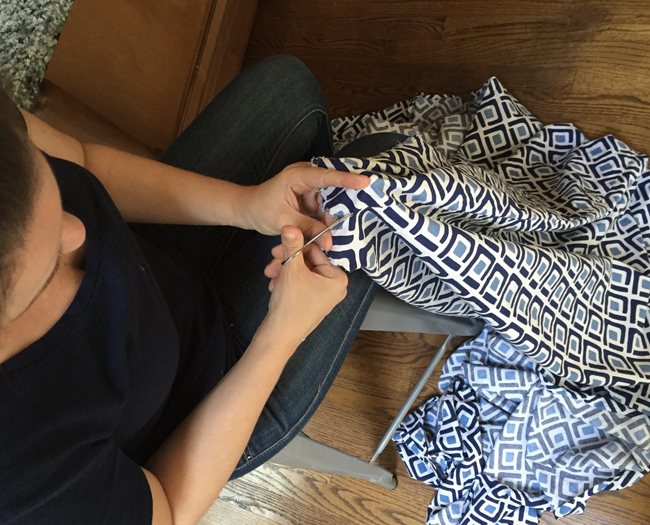
Step One: Get cocky, quickly followed by an enveloping sense of dread. Because it’s going to freak you out to clip your friend’s property in half. Even if she’s laughing and taking an iPhone pic while it all goes down.
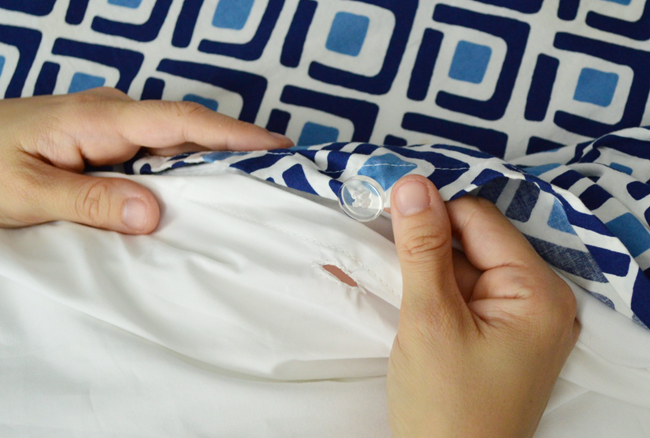
Basically I perched on her kitchen stool and used baby scissors to slowly work my way around the perimeter, just clipping the little threads that hold the front side of the duvet cover to its back side (I didn’t actually cut any of the fabric). Much like a seam ripper, this worked slowly but surely, and soon enough I was left with two almost identical sides (one had button holes and one had buttons, but otherwise they were the same).
Obviously, the duvet cover has to have the same patterned or colored fabric on both sides for this to work (essentially, you’re dividing it and then marrying each to a large flat sheet in the color of your choice). We went with white cotton flat sheets, which I grabbed at Target for $8 each. The key is to match the fabric type whenever possible (sewing two 100% cotton sheets together without any stretch makes for a more cohesive duvet without any puckering) and then just choose a color that works with your pattern or color.
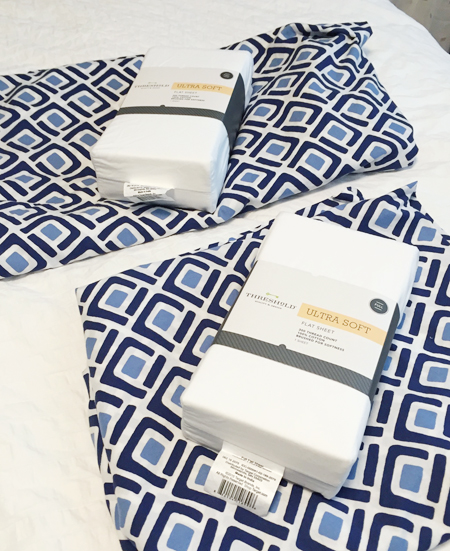
Oh and get the flat sheets a size up from your duvet. I got full-sized sheets for these twin-sized duvet panels because the sheet needs to be AT LEAST as wide and as long as the duvet cover panel, or it’s going to look majorly wonked.
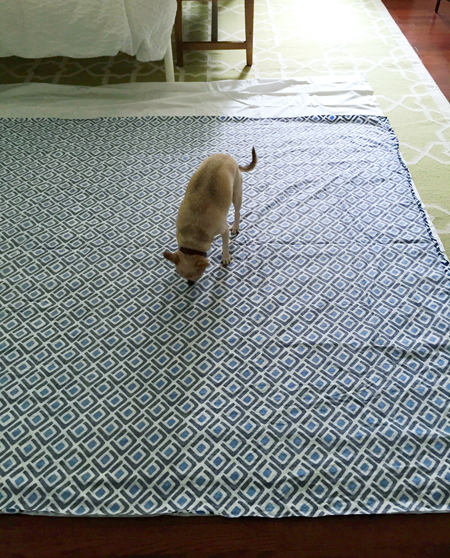
Step Two: Lay out the flat sheet with the duvet cover panel on top and trim the sheet to be the same size as the duvet cover, leaving an extra inch around any side that you are cutting, which will probably be 2 of the 4 sides (the other two won’t have a cut edge because they’ll maintain their original hemmed edge). That extra inch on those two sides is so you can hem/finish them for a clean look and to prevent fraying (just fold over the last inch of fabric on that side and stitch that fold in place with your machine). You’ll want to hem any cut sides BEFORE you join the sheet to the duvet cover.
Feel free to have a chihuahua inspect your work as you go.
Step Three: You’ll then want to stitch THREE out of four of your duvet cover sides back together (all but the short side that has existing buttons or button holes from the original duvet cover). But you want to do this INSIDE OUT, so your seams are hidden inside when it’s right side out. I basically placed the duvet cover pattern-side-up on the machine and then laid the white sheet face-down against it (making sure I was lining up the sides that are the same size with each other).
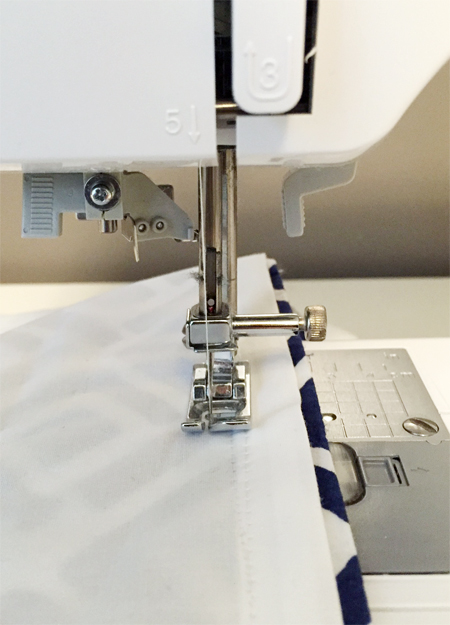
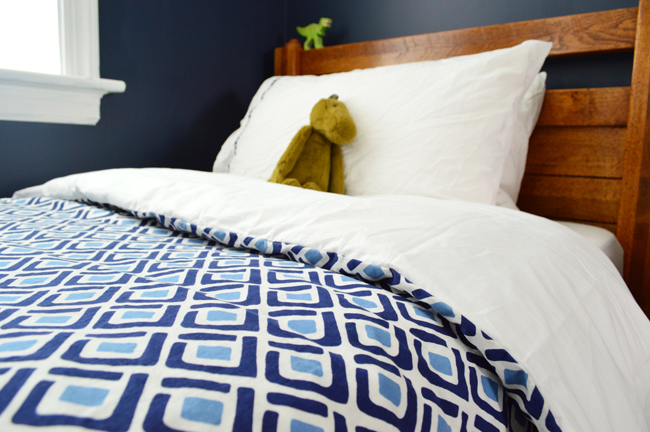
You’ll essentially be left with a GIANT PILLOWCASE, which will look amazingly clean and neat when you turn it right side out (even if your lines aren’t perfectly straight, the duvet insert will fluff in there and all will be forgiven). But what do you do with that open end? You know, the one that stays open so you can stuff the duvet insert in there? Hmmm…
Step Four: Feel your anxiety ratchet up, but then investigate the situation. The original duvet cover had left only about 1/3rd of that side open in the middle, so I turned everything back inside out again and sewed those outer corners together the same way I had done the other three sides, leaving just the middle third of the duvet cover gaping open.
Step Five: The original duvet cover had used buttons to close the gap, so it meant by splitting them apart I had one cover with buttons (but no holes) and another with holes (but no buttons). So on the latter, I just sewed these brown buttons onto the white side wherever there was an existing button hole on the patterned side. A moment of silence for John’s old pair of cargo shorts that heroically donated these buttons.
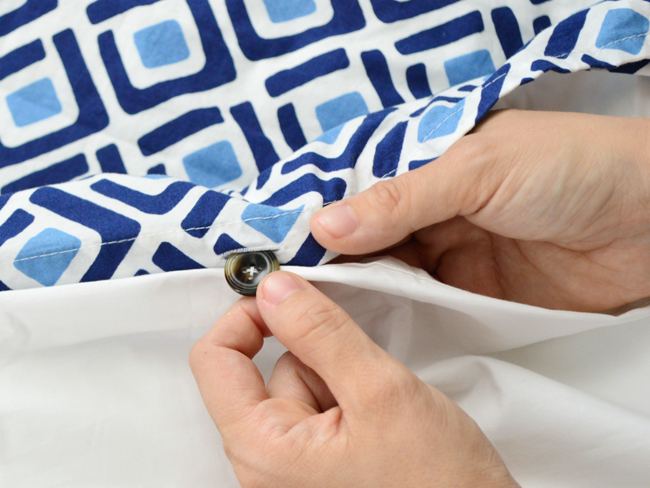
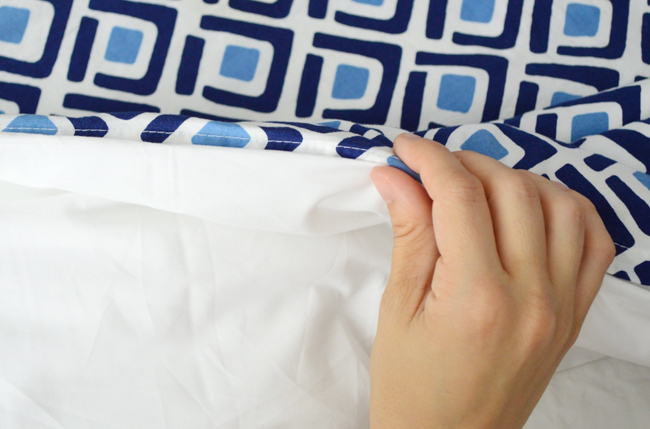
Oh, and the trick here was to sew the buttons on the INSIDE hem of the white sheet, that way you can button it in a way where the duvet cover sort of folds over itself to hide the buttons. I feel like that’s weird to explain / show, but if you’ve ever had a duvet cover like this you’ll know what I mean. The buttons and holes basically hide themselves so it looks like this when you button it:
Step Six: Now the other duvet cover (the one with buttons, no holes) scared me a little more. I had never made a button hole before, so I just winged it after staring at the “pro button holes” on the finished duvet cover I had just completed (side note: I really hope someone finds this post by Googling “pro button holes”). It appeared as if someone had just made a small slit in the fabric and then did a bunch of little knotted loops of string around all sides of the opening so it wouldn’t fray or rip over time. I’m sure there’s a fancy term for that kind of stitch. Maybe knotted whipstitch?

So after I made my little slit I basically just did tons and tons of looped knots around the entire perimeter (I went around it a few times over to make sure it was all nice and covered so it hopefully wouldn’t have a bunch of frayed strings sticking out after one washing). They weren’t nearly as lovely as the pro button holes (#SEO)…
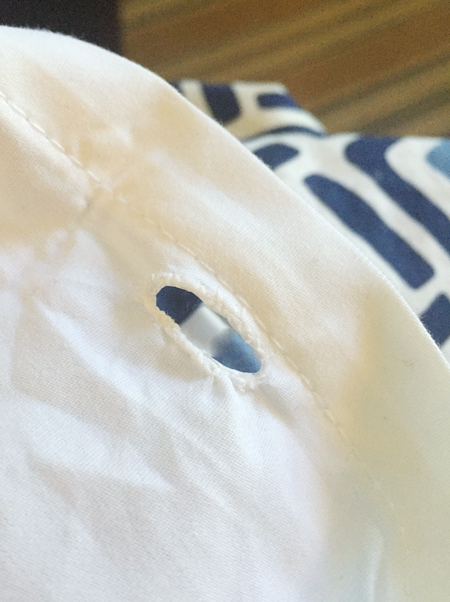
… but they worked like a charm. And once the buttons were tucked into the holes, well, the buttonholed duvet cover looked just as good as the buttoned duvet cover – which was a giant relief since there were more than a few moments of doubt.
So that’s how this girl (points to self with thumbs while grinning the grinchiest grin you’ve ever seen) made one duvet cover into two – all without actually launching the sewing machine out the window. Not gonna lie, there were a few threats of that happening, but it’s is still sitting pretty in the guest room.
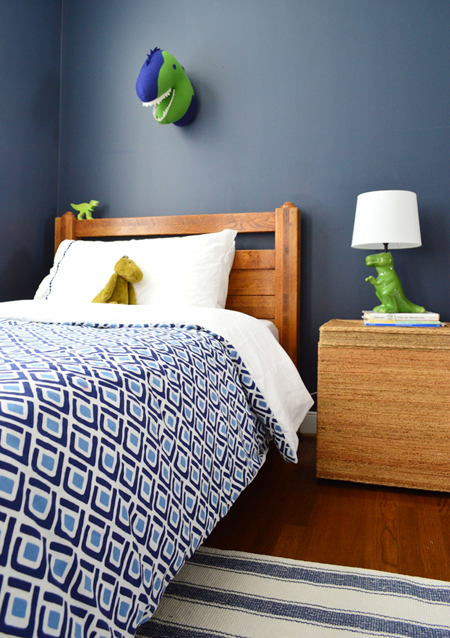
Also, in case it wasn’t clear from the photos, her son IS OBSESSED WITH DINOSAURS. As in, he can name like 10,000 and thinks I’m hilarious when I say things like “oh is that a brontosaurus?” (“no Aunt Sherry, that’s a brachiosaurus! And this is an apatosaurus and this is a plesiosaurus!”).
And aside from grabbing those playful little shark and dino wall heads and a new T-Rex lamp, the M.O. of the room so far is just trying to use what they already have – like their existing rug and an old woven side table as the nightstand. And I’m happy to have helped by magically (if by magically, you mean semi-nervously and sweat-i-ly) turning one lonely duvet into a matching set.
To check out more of my love/hate fueled posts about sewing, here’s how I:
- sewed a patchwork quilt for my daughter
- made a little stitched quilt for my son a few years later
- sewed a beanbag pouf (Burger is hilarious in these pics)
- made curtain panels for the dining room (it’s easy!)
- used two cloth napkins to make accent pillows
- made a drapey pom-pom-fringed canopy over our daugher’s bed
*This post contains affiliate links
The post How To Turn One Duvet Cover Into Two appeared first on Young House Love.
ESCAPE Vintage is a Classic, Affordable THOW
The ESCAPE brand of tiny homes are some of the most memorable. Forbes has even called the homes “the most beautiful Tiny Houses in the world.” The latest ESCAPE design, Vintage, is also the company’s most affordable. ESCAPE is also offering a special for the first 10 buyers of the Vintage. They will deliver the home […]
Sunday, September 18, 2016
Silverthorne Gooseneck Tiny House
Greg Parham from Rocky Mountain Tiny Houses just sent some photos and information about his big gooseneck tiny house called the Silverthorne. This build is one of our most beautiful by far. Its custom designed gooseneck chassis and shed roof design (24 foot deck with an 8 foot neck) make this tiny house feel spacious […]
Friday, September 16, 2016
Tiny Houses for Sale in Australia: Top 5
Oh give me a home, where the kangaroos roam, and the beer-holding budgie-smugglers play… If you’re anything like me, you’ve dreamed of living out in the Australian outback with nine of the ten world’s most venomous snakes, several killer spiders, monitor lizards, saltwater crocodiles, dingos, and Tank Girl. (There’s a reason the Australian national language is […]
Thursday, September 15, 2016
Diversity in the Tiny House Movement Jamboree Special Edition #2
You might have guessed by now that the podcast crew does not shy away from a good debate. And, we’re not afraid to ask tough questions. And no time in our short history of interviews have we proven that more, than during this week’s Jamboree interview with Jewel, Bonnielee, and Dominique; The Tiny House Trailblazers. […]
Wednesday, September 14, 2016
The Role Of Vendors At The Faire
Now that the 2016 Tiny House Jamboree has drawn to a close I am able to really sit back (not just for a few minutes) digest all the photos, review all the business cards I picked up, have a look at my notes, recall my conversations, and do some Internet homework. Over the course of […]
Tuesday, September 13, 2016
Artsy Couple Turned a School Bus into a Loft on Wheels
One day we woke up in our loft in Berlin and it didn’t feel right anymore. We’re both self-employed and had just released an album (Selima) and a movie (Felix) so we’ve had a pretty hectic year. Our Bernese Mountain dog puppy had just joined the family and he hated city life. Looking around online […]
Monday, September 12, 2016
Cedar Mountain Tiny House Affordable Option from New Frontier
New Frontier Tiny Homes in Nashville has been making waves with their Alpha Tiny House. The $95,000 HGTV featured home is beautiful, but might be out of the financial range of most tiny home buyers. Luckily the company has a more affordable option. The custom Cedar Mountain Tiny House is $69,000. The Cedar Mountain Tiny House, […]
Sunday, September 11, 2016
5 Rules to Make Your Downsizing and De-Cluttering Process Easier
Whether you are getting ready to move into a tiny house, or just want to get rid of some of the clutter that’s been building up around your home, downsizing can be an intimidating process. Just one glance at the mountain of random belongings taking over the corner of your room can be enough to […]
Friday, September 9, 2016
10 Tiny Houses for Sale in Kentucky
Looking for a small home in the Bluegrass State? Check out these ten tiny houses available for sale right now! 10. The Rustic Cabin Price: $17,000 Square Footage: 500 Location: Verona Everyone loves a good deal, and you’ll be a long time looking before you find one better than this. The interior walls need some […]
Thursday, September 8, 2016
Thinking Outside the Tiny House Box Jamboree Special Edition #1
Get ready to split your pants with laughter for this week’s irreverent interview with two of the funniest guys in the tiny house movement, Andrew Odom and Deek. These two know each other better than even THEY would like to admit so the banter, questions, answers, rap lyrics, and information is as engaging and funny […]
Wednesday, September 7, 2016
TMI And The Art Of The Tiny House Blog
In 2009 Tiny r(E)volution was born. It started out as just a free WordPress.com blog with the purest of intentions. It would be an online journal where my wife and I could document our “ahead of the trend” tiny house build. I had been keeping some sort of blog since 2004 when I literally had […]
Tuesday, September 6, 2016
A Teachers Lounge Makeover, Just In Time For Back To School
Kids going back to school means that teachers and staff are going back too, so we were psyched to make their return a little brighter for one local public school who reached out to us for help with their teachers lounge.
So here’s the scoop. Back in June, someone who had seen our makeover of Hudson’s room reached out to see if we’d be interested in another volunteer makeover for a good cause. The principal and the PTA’s goal was to update the teachers lounge over the summer to surprise the staff when they came back in September. Teachers and school staff are SO DESERVING, so it was an easy yes for us.
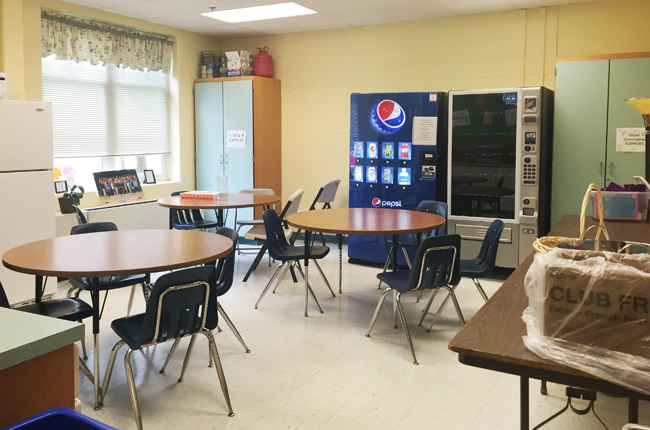
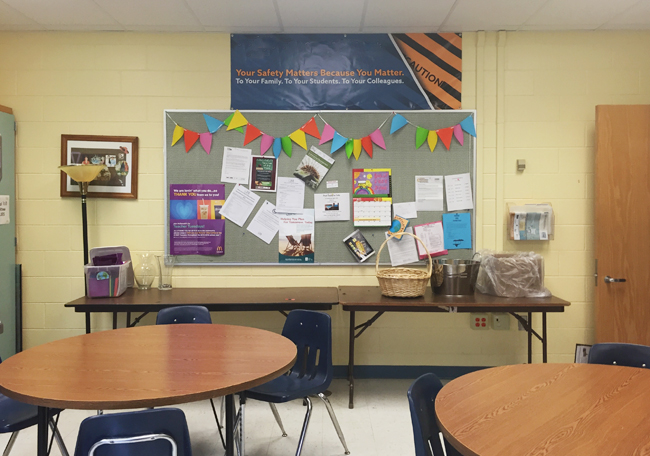
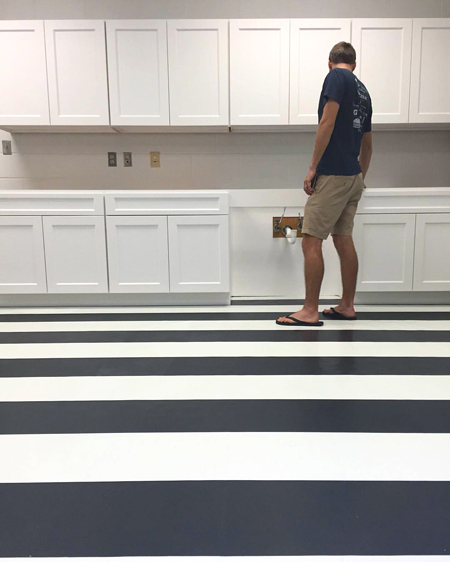
While the PTA had earmarked a portion of their “teacher appreciation” budget for this project (not a single dime of the school’s funding that could go towards students or supplies would be spent at all), our collective goal was to dip into that teacher appreciation fund as little as possible. So here’s what the space looked like when we first laid eyes on it:
The principal and the PTA had also enlisted the help of a local contractor, who is the true hero of this project. Ryan of Ferguson General Contracting donated LOTS of time, labor, and actual items to the space. We steered the design (choosing materials & accessories) and executed some of the finishing projects (like the lettering on that back wall), but the big stuff – like painting, cabinetry, flooring, and backsplash install – fell into his capable hands.

We made this quick little video to give you an overview of everything (including some stellar dancing by John):
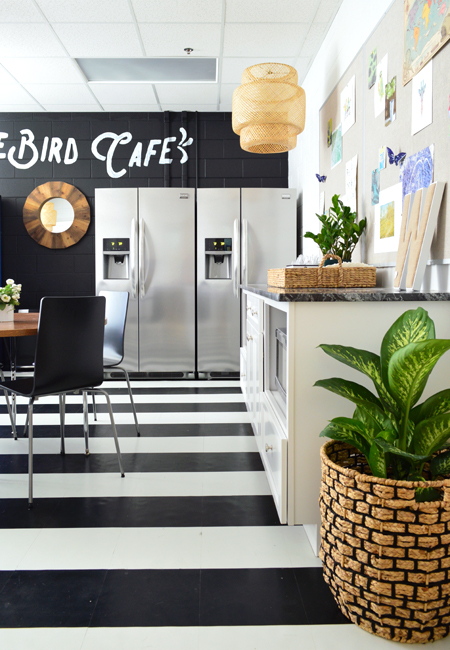
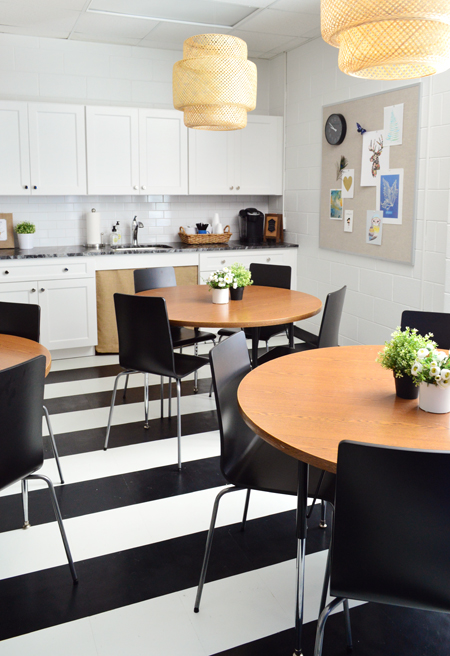
The principal, who arranged this whole surprise, wanted a room that still felt fun and energetic, but a bit more “grown up” (since it’s one of the few kid-free spaces in the building). That’s partly why we chose the black-and-white color scheme since contrast can add lots of energy to a room without a circus-load of colors. We know they’re surrounded by primary colors all day in their classrooms, so we went with the whole cafe/bistro vibe in the hopes of providing a nice counterpoint. And it is a lunch space, after all.
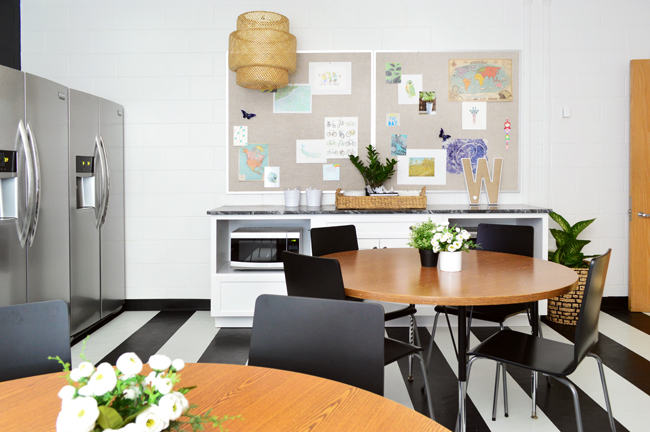
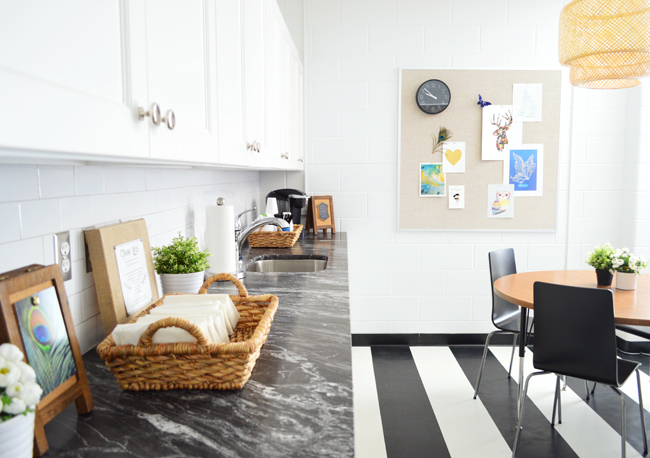
That “buffet” area under the bulletin boards is a huge improvement over the folding tables that were there before (see below). Now it houses the two matching microwaves, which Ryan kindly donated, while still providing lots of great storage and counter space for PTA luncheons and stuff. Oh, and those are the same bulletin boards as before – just minus the gray-green fabric someone had pinned over them a few years back.
The new kitchen area is the quiet star of this space. It was exciting to give them such a updated space, without having to dip even a penny into the PTA’s teacher fund at all (it was all VERY generously donated by Ryan).

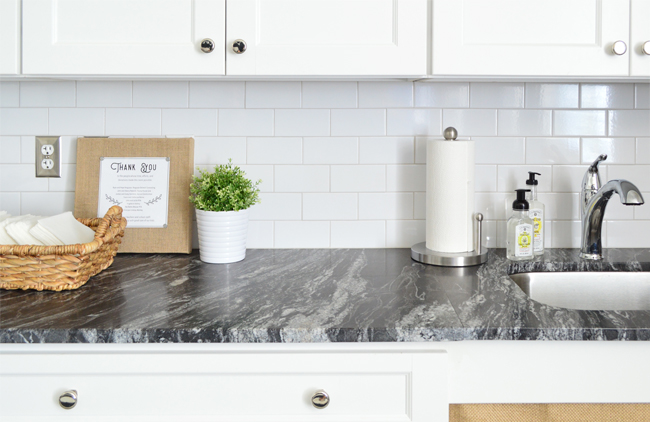
The cabinets and hardware are from Better Kitchens and Baths, the counters are from Classic Granite and Marble, the backsplash tile is from Mosiac Tile Company, and the faucet is from Ferguson Showroom. We bought the chairs in the middle of the room from Ikea. They were the right price (we needed 12!), and their steel and black tones tied right into the steel and black legs of the existing tables.
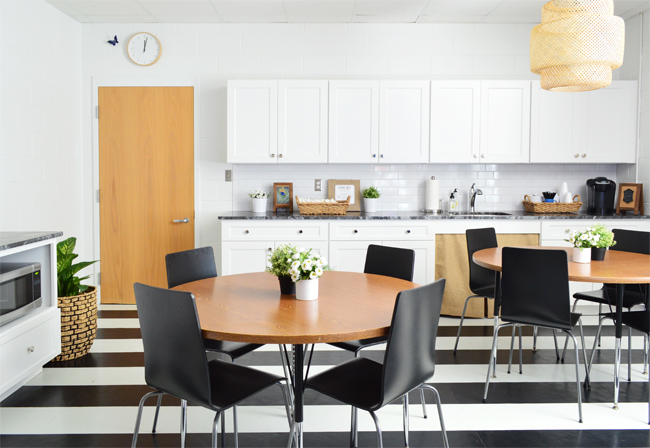
We shared a little sneak peek of the floor on Instagram a little while ago (the principal requested that we stick with “commercial vinyl” so the room could maintain the same cleaning/waxing routine as the rest of the building). At first we were stumped, because a lot of the commercial vinyl options are sort of speckled and well, commercial looking. Then we realized that the same solid black & white tiles that are applied in a checkerboard pattern could be glued down in stripes for a fun new spin, and Ryan’s crew installed them for this great crisp look:
The sink base had to remain doorless for accessibility reasons, so a parent donated this custom-made burlap-like curtain (which is velcroed into place) to keep it concealed. We like that it ties into the other natural/woven tones that we added in other places, and since it’s removable it can be taken down to be washed or switched out down the line if need be.

The honed veiny black granite was a discounted slab that was on-hand and budget friendly, but it turned out to be just about perfect. With the floors being so graphic, it was nice to have something a little more irregular to soften those sharp lines on the floor. Oh, and that little burlap sign on the counter is a “Thank You” plaque of sorts to everyone who contributed to the space.
Let’s talk about the fridges for a second too. They were actually a really important and challenging part of the project. There was a clear need communicated from the principal that the teachers and staff needed more than their existing single fridge for staff lunches and the occasional PTA luncheon or fundraiser. Their dream scenario: two nice large ones with ice makers.

And not only was the current fridge not sufficient storage-wise, it also felt plopped into the room’s layout in an awkward way. So we were determined to not only figure out a way to incorporate TWO fridges into the room, but to find a better place for them to improve the overall flow. Here’s a similar angle, minus the old fridge, which was donated to another school.
Adding two refrigerators to the back wall made the most sense since the vending machines (which were around the same height and depth) had to stay back there anyways. Now that everything is a similar size, that wall looks more balanced and polished. Well, as polished as a room with vending machines can feel.
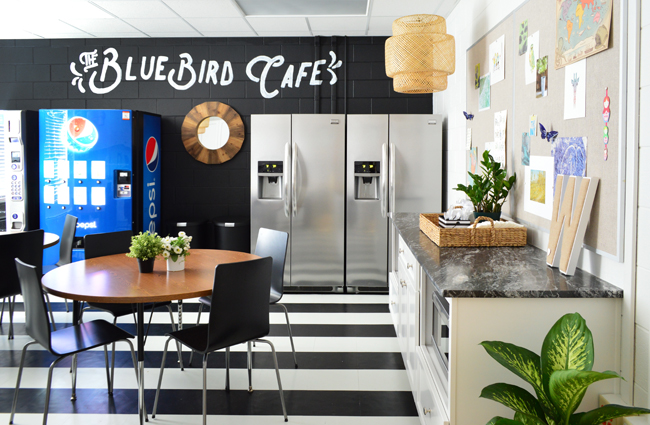
But figuring out WHERE to put the fridges was easy compared to figuring out HOW to get the fridges. The PTA’s teacher appreciation budget would have been entirely depleted on one new fridge, let alone two, so we crossed our fingers and emailed Frigidaire to see if they would be willing to donate two fridges to such a deserving group of people. And boy do I wish you could hear the principal’s reaction when we called her up to gleefully announce that they said yes! We were all jumping up and down so much that Burger got freaked out and started barking.
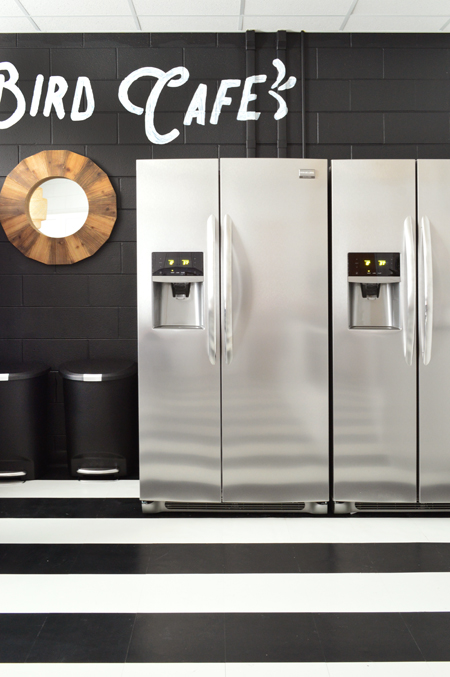
The two donated fridges are Frigidaire Gallery Side-by-Side Refrigerators. Not only do they give the teachers and staff more than double the storage space (and double the ice making!), the stainless steel finish helps tie in some of the other metal elements in the room, like the chair/table legs and the cabinet hardware. Plus they’re smudge proof, since we’re sure the teachers deal with enough fingerprints in their classrooms.
The “light fixtures” – which are actually these pendants from Ikea – were another easy way to incorporate some of the natural tones that appeared in the tables and the door to the room – and we love that they warm things up a little more. Since we couldn’t add electrical wiring, we just removed the light fixture part and hung the shades from clear fishing wire.
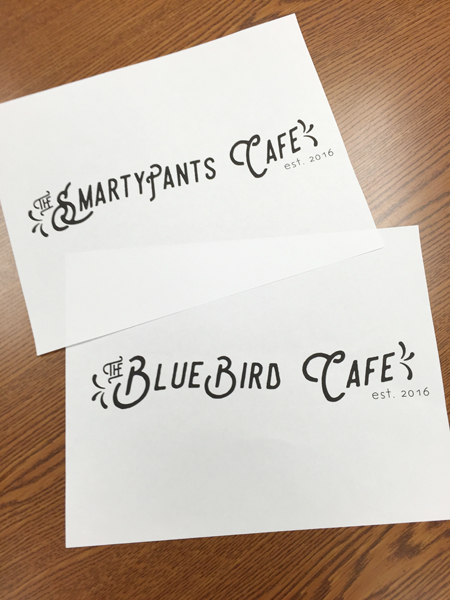
And as for our little Bluebird Cafe “mural”, we thought that blank space along the top of the back wall could use a fun focal element. John mocked up two fake cafe names in Photoshop, and while “The SmartyPants Cafe” was cheeky, we didn’t want the teachers to think we were being sarcastic weirdos, so we went with the other one, which references their school mascot.
Using one of the school’s projectors, we first copied the letters onto acetate (John printed the type in reverse too, which ended up being much easier to trace). The font is called “Steelworks.”
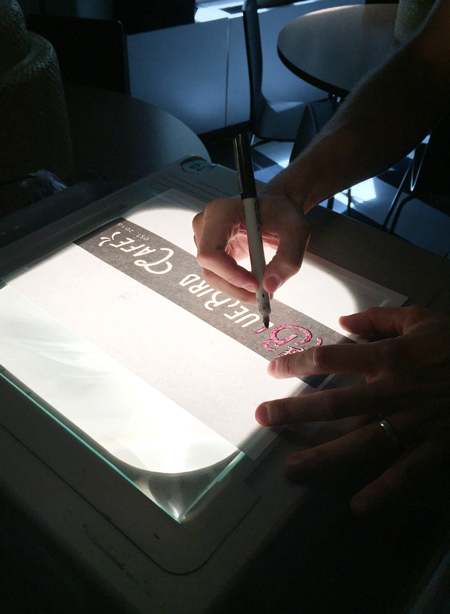
Then I used a paint pen to trace the projection onto the wall, which was slightly more challenging than I expected since it was hard to get the room dark enough to see it on that black wall.
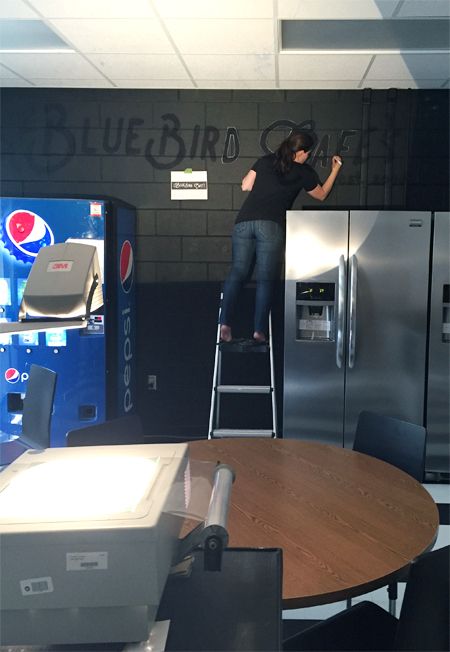
After it was all traced, we filled the letters with white paint using a small craft brush. Somehow there are no pictures of that step, but it was as easy as it sounds.

Then we loaded in all of the finishing touches, like the planters on the tables, the wood mirror, some greenery…
… the baskets on the counters, some colorful art on those bulletin boards (which will obviously get filled a lot more with notices and fliers as the year goes on), and even a donated Keurig machine.
The project finally wrapped up with just a week to spare before all of the staff returned from summer break. The principal (who had kept the makeover a secret by posting a big “DO NOT ENTER! PLUMBING ISSUES!” sign on the door all summer) called an all hands on deck meeting and surprised everyone by leading them into the room, where we were excitedly waiting with Ryan and his wife to see what they thought.
Their reactions were priceless – especially from the principal who teared up when she explained why we all wanted to come together and update this space for them (which made me tear up because they are just such an amazing group of humans and we were so honored to help make this thing happen).
As for the room’s accessories, here’s a source list for ya: woven basket planter,
Tiny Mule Wagon “Lost Sea Expedition” TV Series
Call it the first TV series ever filmed from a mule wagon. The Lost Sea Expedition TV series is about a voyage I (Bernie Harberts) took across America with my mule. Just me and mule Polly in our home made rolling home. The series was filmed with only the gear I carried in my wagon […]
Monday, September 5, 2016
Minim Home Design Now in Production for Buyers
If you are a fan of the Micro Showcase and Brian Levy’s Minim Homes design, then you will be happy to hear that an operational production line for the Minim House is now available. The original Minim Home is based in Washington, D.C. The manufactured version of the Minim House can be ordered both on a trailer […]
Sunday, September 4, 2016
Tiny House Village and Tiny House Giveaway
Visit the “Tiny House Village” with 15-20 tiny homes on display. Including Tiny Houses on wheels, yurts & teepees, coming from California, Oregon, Washington, Canada & more. Tour beautifully finished and upgraded tiny homes, from affordable to luxury. Meet the professionals as they help you find the home that fits your needs and budget. While […]
Friday, September 2, 2016
10 Tiny Houses for Sale in Alabama
Ready to downsize in the Heart of Dixie? Good, because we have ten wonderful tiny houses for you to consider in the Yellowhammer State. 10. The Woodlover’s Dream THOW Price: $24,500 Square Footage: 128 Location: Pinson Trimmed inside and outside with beautifully finished cedar, this tiny house on wheels is perfect for anyone who loves […]
Thursday, September 1, 2016
Tracey Powell’s Modern, Tiny, Blissful Waves on Wheels
At first glance, Tracey’s house looks like it just returned in time from an episode of “Back to The Tiny House Future”. Honestly, we have never seen anything like it and her story is just as original as her vision. If your taste leans towards Modern Minimalist and you’re not a fan of all the […]
Subscribe to:
Posts (Atom)