There’s a joke I have with my running buddies that somehow our conversations always seem to turn to sheds. We’re either admiring the ones that we pass by on our neighborhood runs, commiserating about how we all wish we had more storage, or scheming about how to convince our wives that we need one before whatever home update they think should be next on the list. Obviously you can tell that we are really exciting people who live really exciting lives.
Well, thanks to the recent arrival of this puppy, I’m officially the envy of my running crew (probably fleetingly, but still). And guess what? I didn’t even have to bust out any of my wife-convincing schemes.
So why a shed? The reasons are two-fold: to improve our garage and to improve our yard.
First, our garage seems to be in a constant state of disarray, and everything is constantly being coated in a thin layer of sawdust since it’s where we do most of our projects / cutting / building. Anyone who has listened to our podcast knows that it has been an organizational sore spot for us, mostly because of its competing functions as entryway, workshop, and storage for a variety of things. So I’ve been hankering to get all of our tools, scrap wood, and other messy stuff out of there in the hopes that we can keep it focused on (and clean for!) family stuff like balls, bikes, sleds, beach chairs, strollers, etc (along with car parking, of course).
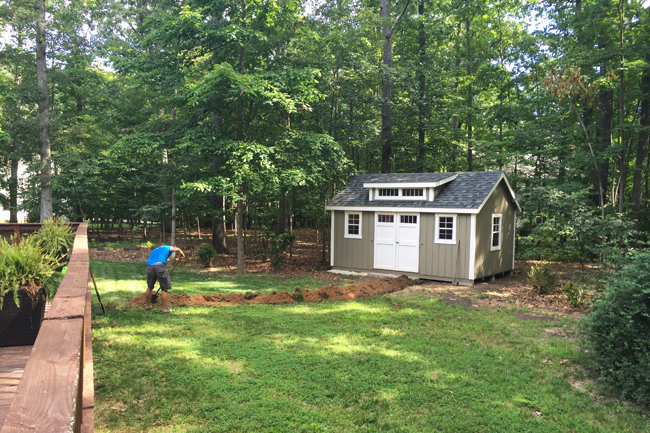
The promise of improvement to our landscaping is what quickly got Sherry on board with the idea. The short version of the story is that we’ve struggled with privacy in one particular area of our backyard where our weirdly-shaped lot puts us much closer to one neighbor than any of the others. We’ve got such great tree privacy between our other backyard neighbors that this particular spot really sticks out, and our efforts to create privacy with plantings have failed pretty spectacularly (we spent a big ol’ chunk of cash on two large holly trees that later died – which was definitely not our proudest home improvement moment).
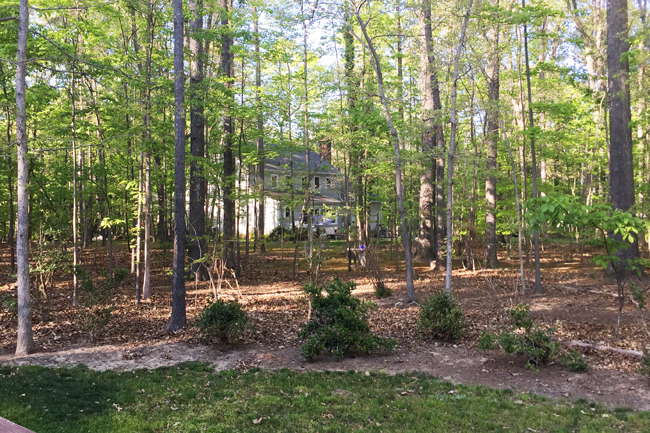
We’ve also been working towards extending the grassy area of our backyard (leaves seem to creep closer every season) so we thought a shed in this spot would help us visually push back the end of the yard and keep it there. We’re also going to move that big bush in the foreground on the right (gotta wait until the fall), so pretend it’s 10 feet further back into the woods instead of squeezing in on the backyard.
![]()
We weighed a bunch of options when it came to shed completion: building it from scratch, assembling one from a kit, hiring a handyman, buying something from a big box store, etc. And after much deliberation, we landed on buying it from a local company who trucks in custom sheds built by an Amish company up in Pennsylvania.
Like with any home project, we weighed the costs and time it would take to DIY it versus hiring it out. Given my work pace on big building projects like this (deck anyone?) it made more sense to spend our time working on other paying jobs instead. Plus, we were so enamored with the well-crafted options of the Amish-built versions that it was hard to pass them up.
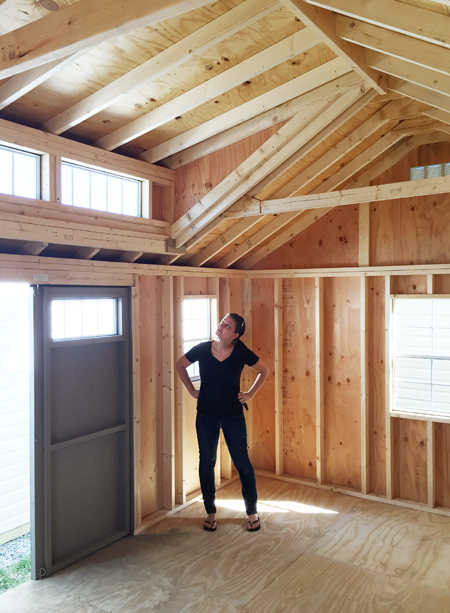
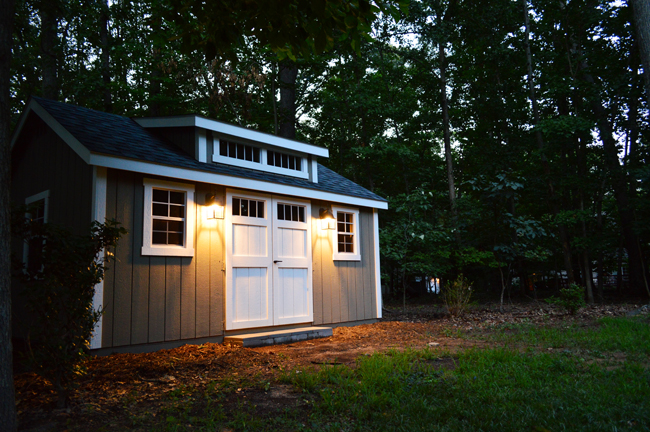
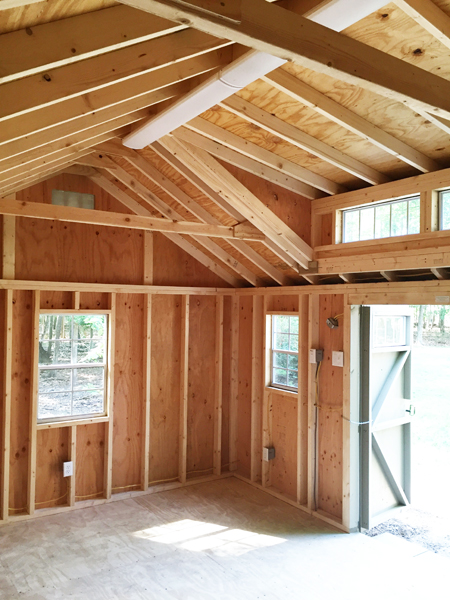
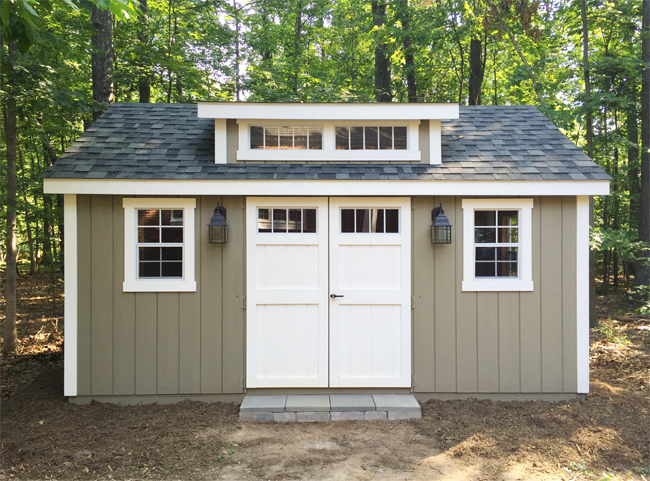
One of the coolest things about this local company was that we were able to customize just about everything: the shed’s size, the type of siding, the color of the siding & roofing, the number and size of the windows, the type and size of the doors, the type of trim, and even the addition of an extra dormer on top which wowed us when browsing samples on their sales lot. The difference in natural light it lets inside is amazing.
After we put in our order, we just waited around four weeks for it to be constructed in PA and trucked down here for installation. We did have to transplant a few bushes and cut down two small trees, but fortunately, the area was pretty clear to start with. Then before we knew it, this puppy was rolling down the street and into my open shed-loving arms.
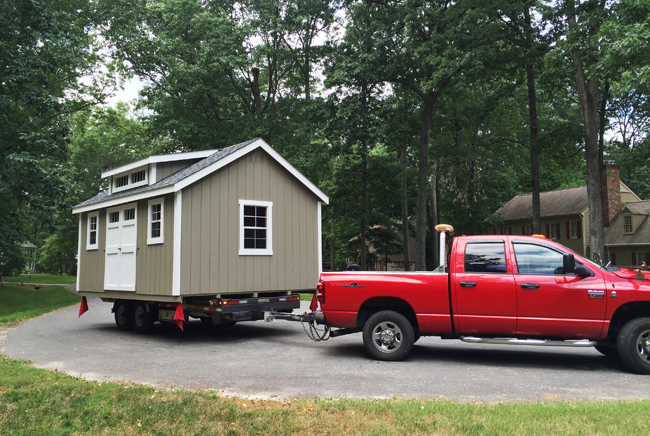
And as you can imagine, I looked like a cartoon dog who just laid eyes on a giant steak.
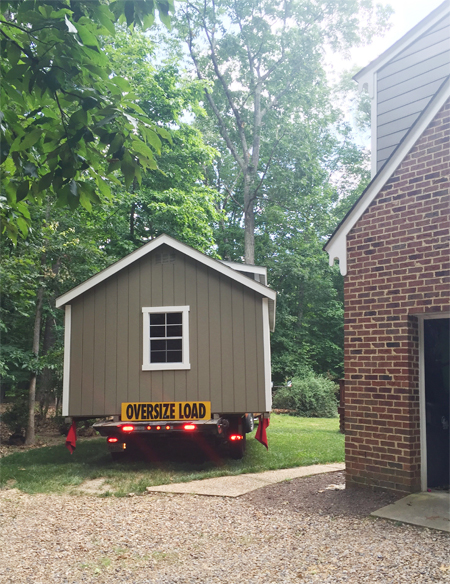
The installation was pretty fascinating, honestly. It was just one dude, a truck, and this special rig that angled it into place. He came out a couple of weeks before to scope out the install spot and make sure he could maneuver everything in, so there thankfully weren’t any hiccups on delivery day.
With his truck in place, the trailer just steeply tipped the whole thing and started to move it back into place. It certainly wasn’t something you see everyday.
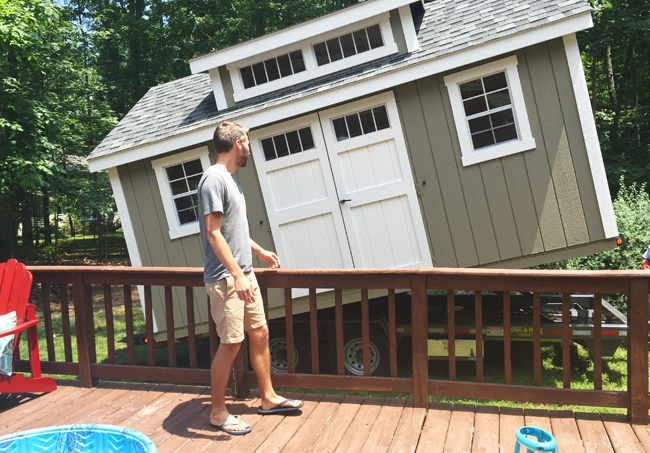
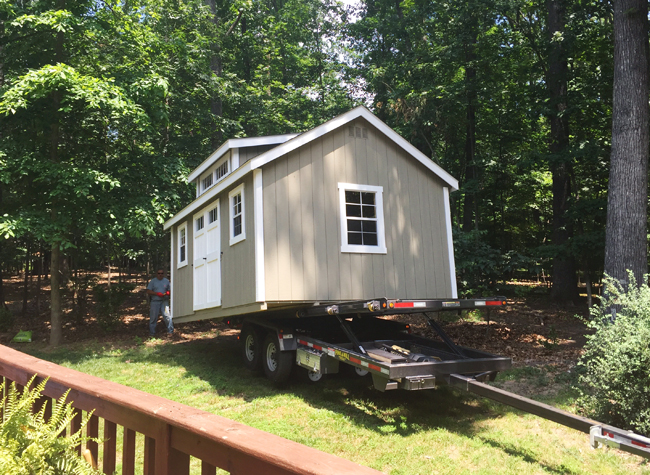
I still can’t believe it was just one guy. Once he had it close to the ground, he slid some PVC pipes under it to help roll it into place and used the hydraulics on the trailer to nudge it exactly where we wanted it, making sure it was level and secure it in its final spot.
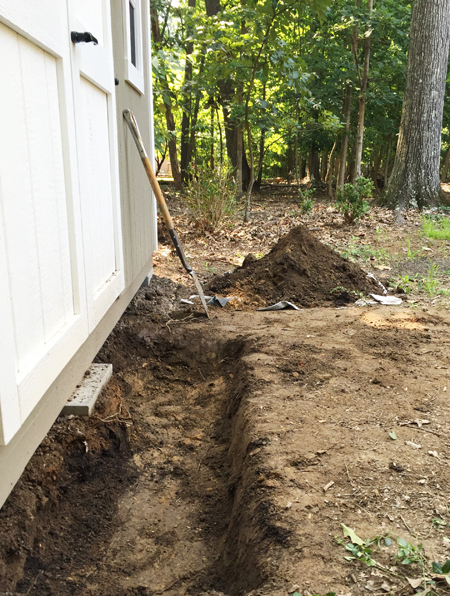
Once it was delivered, we still had some work to do. First and foremost, we needed to get some electricity over to it (you know, for outlets and lights) so we could actually work in there. With our electrician queued up to run everything, I took on the task of digging the trench for the power line. He advised us where it should go and how deep it should be (12″) so I knocked it out on one not-totally-scortching-hot Sunday morning (there’s also a little side story to this step that we chatted about in this week’s podcast, episode #10).
Inside we had them add outlets on each wall, putting them at counter-height along the back wall (I eventually plan to build a work table there, and want it to be nice and easy to plug and unplug tools). We also installed these two 4-ft florescent-style LED lights across the ceiling. We considered “prettier” lights at one point, but ultimately we just wanted the lights to be bright and out of the way.
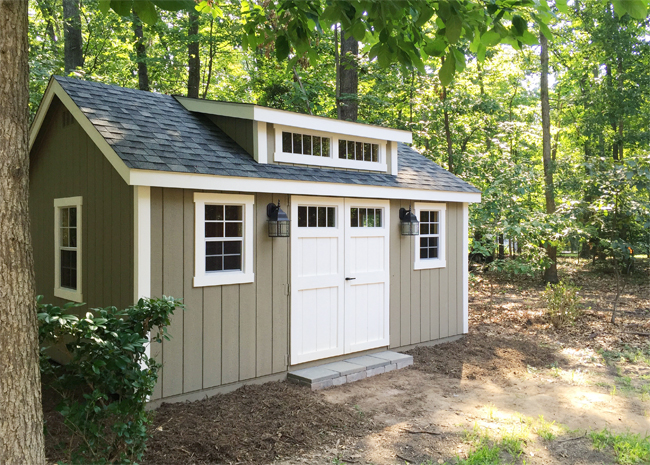
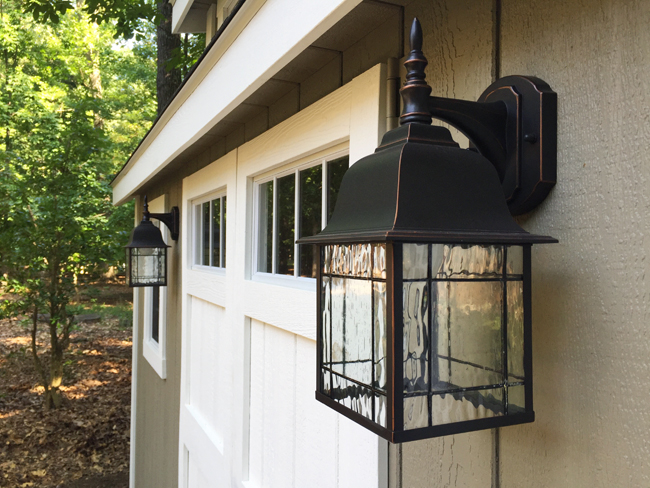
We also added two sconces on the outside to bring some more outdoor lighting to the backyard and give the shed a bit more charm. We chose these LED fixtures because they were similar to what’s on our house already. Other choices like the shed’s siding color (which matches our house’s siding color) and the roof color (again, which matches the one on our house) also help to make sure both structures feel nice and related when you see them together.
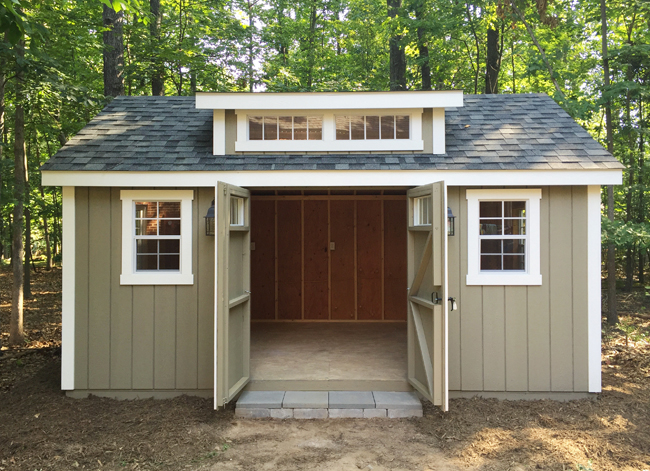
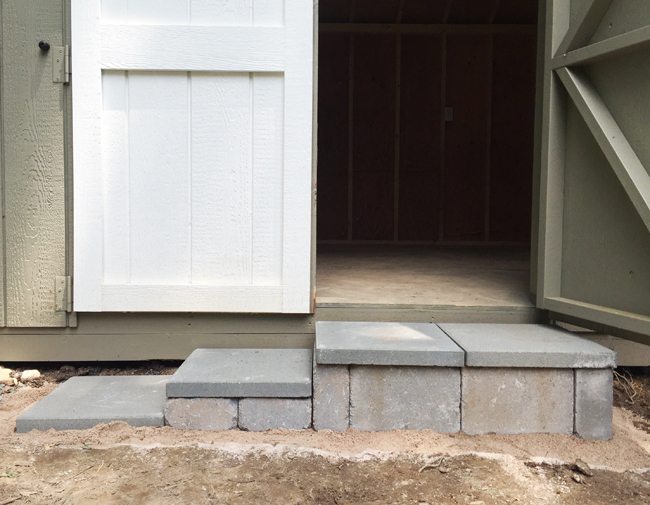
Besides getting the electrical added, our other task was building a step since it was just slightly too high for it to feel natural when stepping up into it. We didn’t opt for a ramp because we don’t plan on storing our mower or anything else on wheels in there, so we built a simple step out of some stock pavers from Lowe’s (there’s also a story about that paver hunt on the podcast too – apparently this shed spurred a plethora of behind-the-scenes mishaps).
I laid the steps much like the paver patio that we laid in our last house, although on a muuuuuuch smaller scale. The only slight complication was that a cinder block jutted out from below the shed (that’s not typically how they’re installed, but the installer encountered a root that prevented it from going back any further).
After digging my 12″ hole (see above), I filled it first with about 6″ of paver gravel, which was tamped down and leveled. Then I did the same with about 4″ of paver sand.
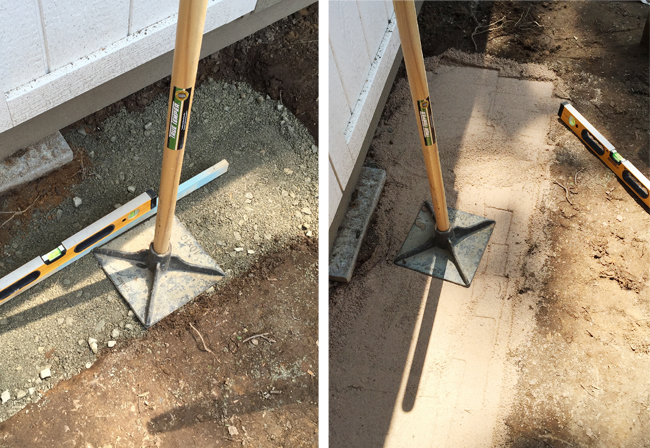
At first, we weren’t sure exactly how high we wanted the step, so we experimented with a few options – with or without the thin pavers on the bottom, and with the brick pavers laid flat or standing on their edge. Ultimately we chose the middle variation (thin paver base + brick paver laid flat + thin paver top) because it was the best height (both looks-wise, and also feeling-wise when you step in).
I had to break up some of the pavers to work around that rogue cinder block, but was able to keep the visible portion around the border looking normal. And then I just filled any little gaps with more sand that I packed down.
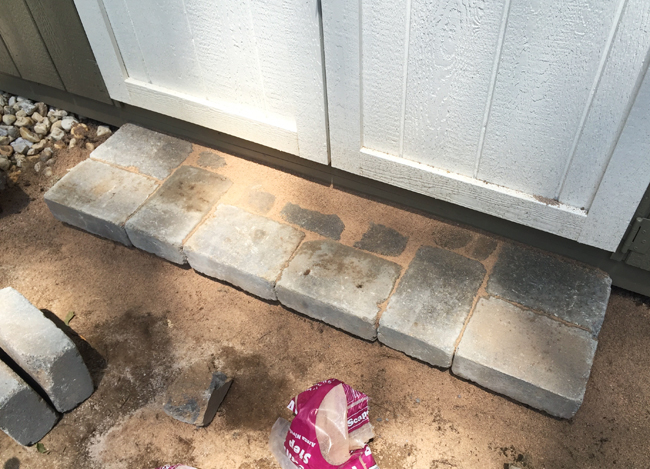
I bought some landscape adhesive to keep everything securely in place but haven’t applied it yet. We’re thinking we might try to hunt down a single piece for the top of the step, rather than the four pavers in a row (maybe something with a very slight overhang, for a more polished look). But for now, this is working great.
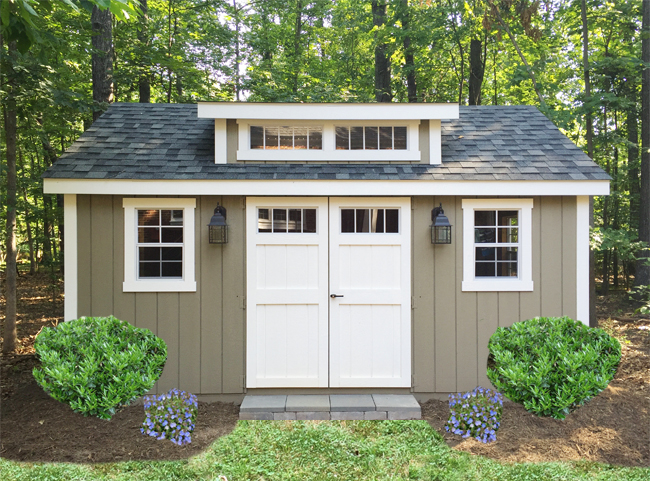
It doesn’t seem wise to do any landscaping around our new shed in the height of the summer heat (oh please let this be the height – it can’t possibly get steamier, can it?). So here’s just a quick photoshop guess at what we might work towards this fall.
We haven’t started moving things into the shed yet, since we’re trying to take our time planning how we want to use the space and how big we want the work bench to be, BUT I AM ONE HAPPY DUDE. All of my shed dreams have come true. And I have a happy wife who has marveled no fewer than ten times about how much more cozy and private the backyard feels these days. The true lesson: if you can’t keep screening plants alive, and everything in your garage is covered with a half-inch of sawdust… it might just be time for a big ol’ shed.
*This post contains affiliate links
The post Makin’ My Shed Dreams Come True appeared first on Young House Love.
No comments:
Post a Comment