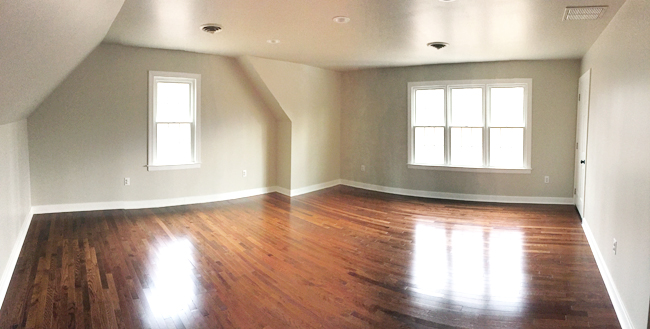
At this point you’ve probably seen our finished and furnished bonus room above our garage, but let’s take a quick joyride back in the DeLorean to talk about how we installed the oak hardwood flooring in there. When we mentioned it oh-so-briefly in our first post about the space, we also promised to share more how-to details, since it was our first time doing a traditional nail-in installation (we previously did a floating hardwood installation). It wasn’t terribly difficult, but it did have its challenges. So for anyone else who might be taking on the task, here’s a rundown of what we did and how we did it.
Choosing Our Floors
First off, why hardwoods? Originally we had planned to do wall-to-wall carpet. Partly because we thought it might be a good choice for a cozy bonus room, and partly because we didn’t buy enough extra when we put hardwoods throughout the rest of the second floor three years ago. Carpet felt like a good, easy option.
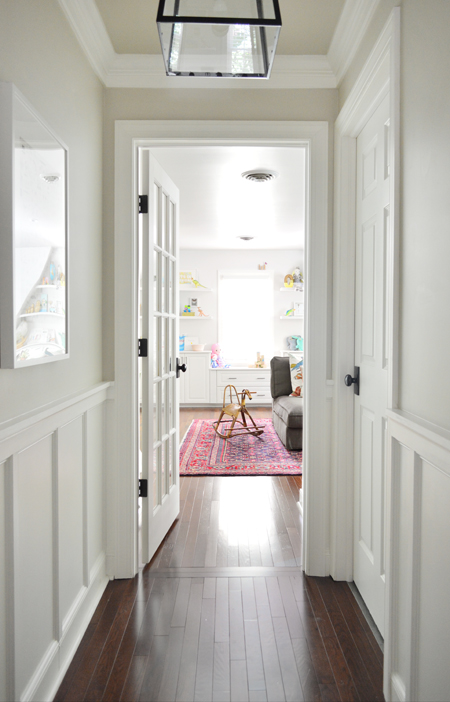
But when push came to shove, we just couldn’t quite shake the idea of seeing the wood floors extend all the way down the hall and into the bonus room. In the end, we’re verrrrrrry thankful we didn’t settle for the easier carpet option.
Our very first challenge was to find matching floors. For the rest of the upstairs, we had used a color called Lono Oak that we bought from Lumber Liquidators, which we learned was being discontinued shortly after we purchased it. So going into the bonus room project, we just crossed our fingers that we could find something similar that would hopefully blend decently well.
Well, the miracle train must have pulled up at the same time that we parked our car, because it turns out that although Lono Oak had indeed been discontinued years ago, some stores still had very small amounts of it lingering in their warehouses. The only catch: it was scattered across four different locations in the country.
It wasn’t the fastest or cheapest thing to have boxes shipped in from places like Nevada, Tennessee, Pennsylvania, and Texas. But since it was all on “final closeout markdown” the extra shipping costs were completely offset by the extremely discounted materials themselves (they were marked down to $1.50 per square foot, compared to the $3.29 that we paid previously). And in other good news, I didn’t have to drive these floors home myself. We all know how well that went last time.

Preparation
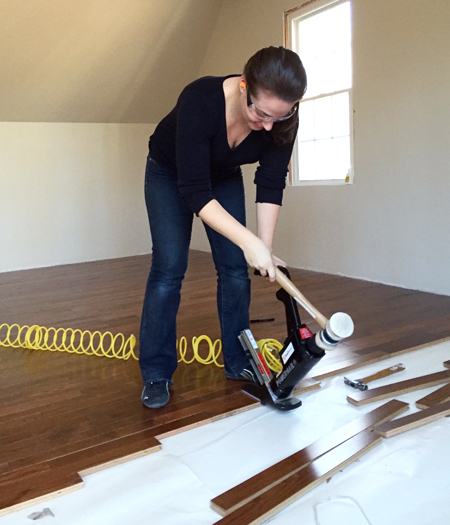
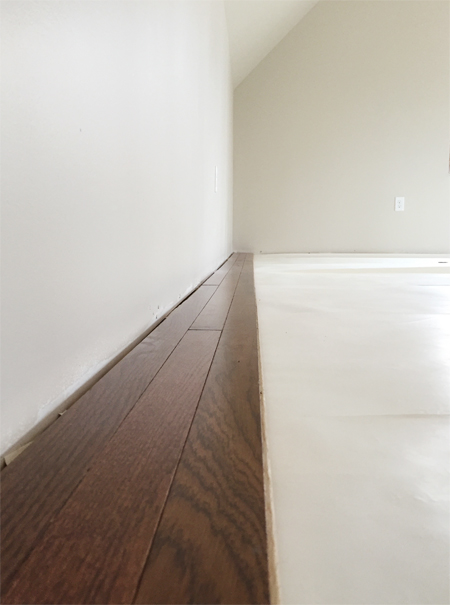
Once all of the boxes arrived, we moved them up into the bonus room to acclimate for a few days. This helps the wood adjust to the moisture in the air of your home, so they can expand or contract accordingly before you start nailing them in. The photo above was taken after we hauled up around 4 of the 15 boxes, so we still had quite the workout ahead of us at this point.
After 5 days of acclimating (it’s usually recommended to give them at least 3), we got started. The first task was rolling out some underlayment, which acts as a vapor barrier and prevents the squeaking of wood flooring against the plywood subfloor under it. Lots of people use black roofing felt, but I had read that this white silicone version was less messy. So we rolled it out across the floor, overlapping each strip just a bit, and cutting the ends with a utility knife once we reached the opposite wall.

Laying The First Rows
The first few rows is where the most mental work is required. Wood floors need an expansion gap around the perimeter so they have a place to go when the wood expands and contracts with changes in temperature and humidity. We did a 3/4″ gap (since that’s the thickness of our wood) and used a ruler to mark where the outside edge of our first row should sit.

We made marks at both ends of the wall and snapped a chalk line between the two. This would become our guide for placing the first row so that it stays parallel to the wall (we read that a chalk line is more reliable than using spacers in case your wall is wavy or uneven).

As we laid out the first row, we added some small finish nails along the top inside edge (which later get covered by quarter round) just to hold everything in place while we got ready to officially nail it into place.
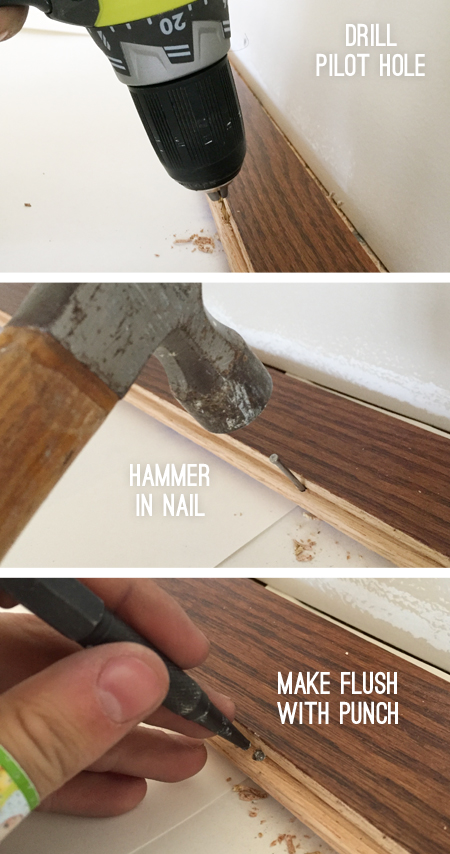
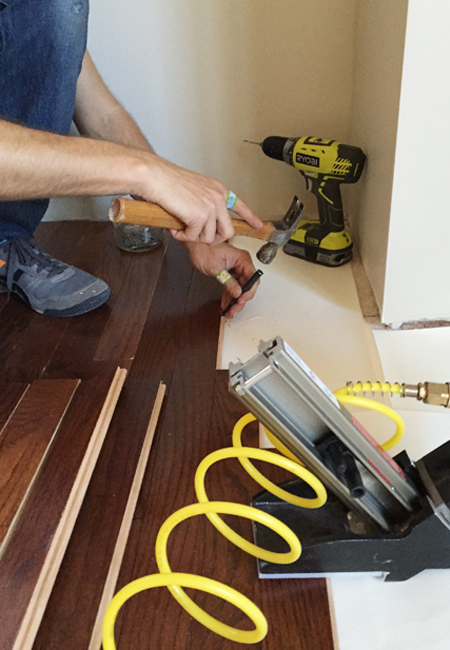
The first few rows have to be hand nailed, since the power nailer is too big to use so close to a wall. We went down the line and drilled a pilot hole about every 10-12″, then hammered in a nail, and finally used a nail punch to make it flush. Warning: this step is pretty tedious.
We had to do three full rows before we had enough room to get the power nailer in there, which is when we expected the project to just fly along. Spoiler: it didn’t exactly fly (this room took us two days) but it was definitely faster than the whole by-hand thing.
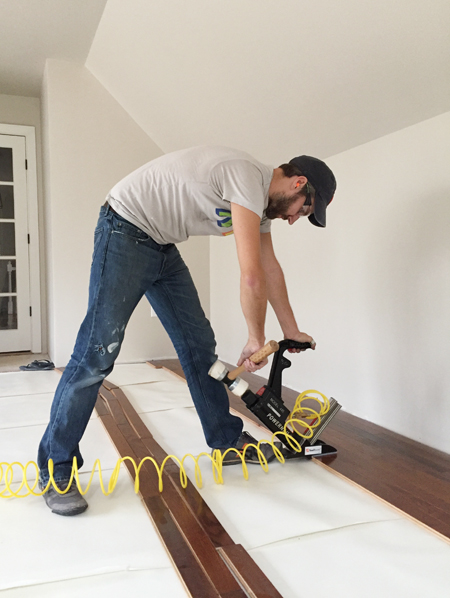
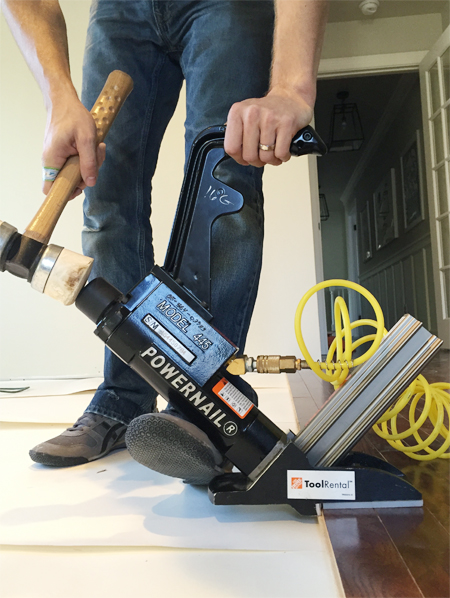
Using the Floor Nailer
We rented an air-powered floor nailer from Home Depot, since it didn’t make sense to buy one for this one project. It was $39/day and we used ours for two days, so it was about $80 in total. We own an air compressor, which is also needed, but those are available to rent too for about the same cost if you don’t have one on hand.
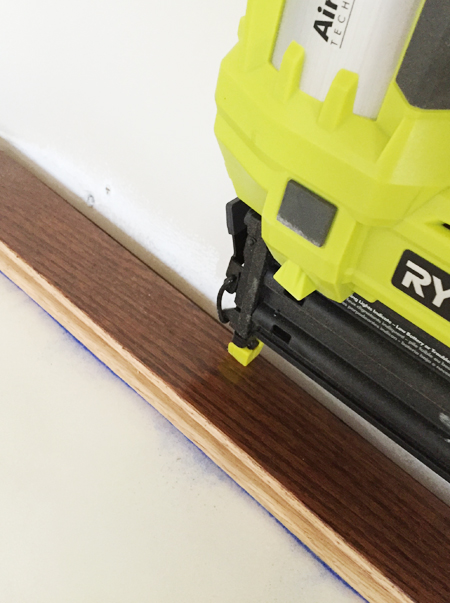
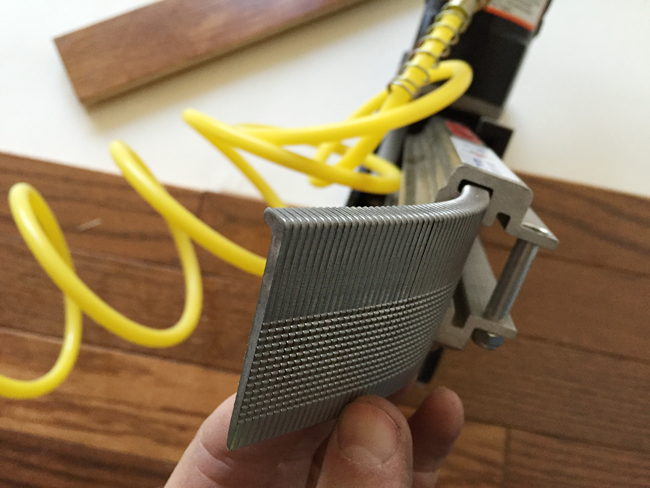
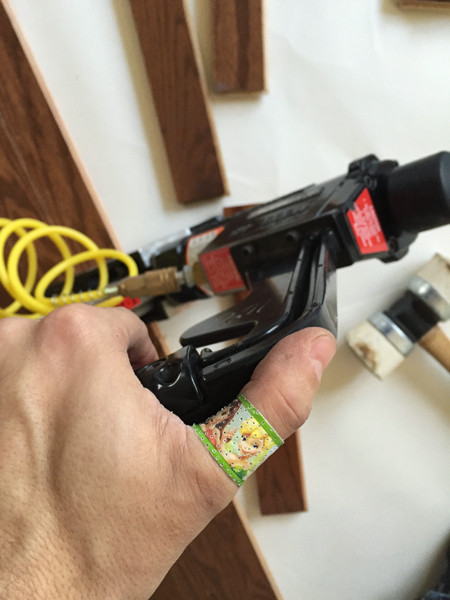
The floor nailer is a pretty cool tool, although it can be a little bit intimidating at first. It basically shoots flooring nails, called “cleats,” into the side of each board, ramming the planks together and securing it to the plywood subfloor below. The cleats come in these long strips that you load into the back of the nailer.
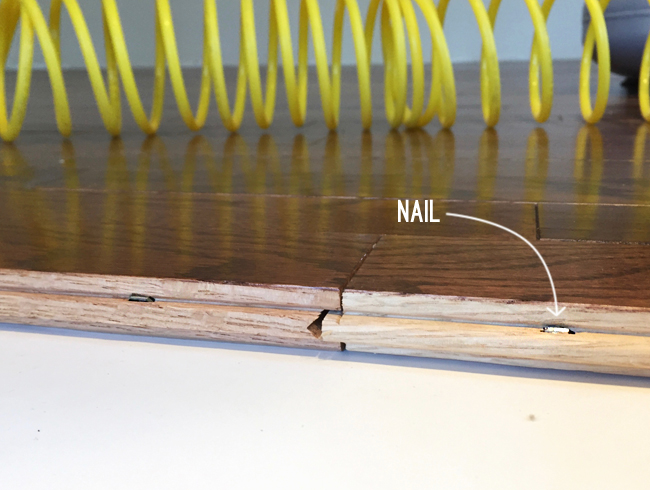
You can see in the shot below how it drives them right into the tongue of the board, sinking them far enough in to not be in the way.
To operate the nailer, you slide it into place over the edge of the board you’re nailing into. Then you pull the trigger with your top hand and smack the plunger on the back with the mallet. It doesn’t have to be a hard hit, but it definitely takes more than a little love tap.
It wasn’t a hard task, but it got a little tiring after a while. To give you an idea, we went through over 1,000 nails. We worked across two days, but even with switching off on the nailing task we were both a little sore from bending over and swinging the mallet repeatedly. I highly recommend shouting obnoxious song lyrics like “HIT ME BABY ONE MORE TIME!” and “SHE BANGS! SHE BANGS!” with every nail hit, just to keep yourself amused and your spouse at maximum irritation level (I feel like this is a good time to point out the ear plugs).
Whoever wasn’t nailing was in charge of laying out the boards, which helped the person with the nailer work a faster. We tried to stagger our board lengths, to keep the pattern feeling random. We also pulled boards from different boxes as we went. In case there is color variation from box to box, this mixes it throughout your floor rather than concentrating it in one spot.
Cutting Boards
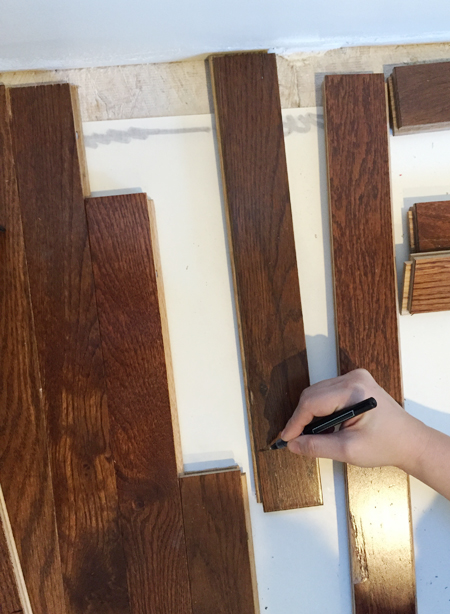
Obviously there are cuts needed at the end of nearly every row, so Sherry kept a running pile of boards with flaws in them, like weird cracks or knots (you can see one in the lower right of the picture below). These were great candidates for end boards where we could off the imperfections and still use the rest of the board.
As we got to the end of each row, we spun the to-be-cut board around 180-degrees, pushed it against the end wall, and then made a cut mark about a 1/2″ in from the end of the board that it would sit against (the 1/2″ + the 1/4″ tongue pressed against the wall gave us that 3/4″ expansion gap that we tried to maintain).
Then we ran downstairs and cut them with the miter saw (we definitely got our exercise going up and down, so we tried to do a few at a time whenever we could). It wasn’t super glamorous work, but my Tinkerbell band-aid helped. #girldad
The Last Rows
We had to hand nail the last few rows because, just like the first few, we had gotten too close to the wall to use the power nailer. And nobody likes swinging a mallet into freshly hung drywall. So we broke out the drill, hammer, and our trusty nail punch again to do these last few rows by hand. This was our least favorite part of the whole process because it felt like a cruel trick to have to go back to this tedious method after becoming so accustomed to the speed of the power nailer.
Once all the boards were in, it was just a matter of cleaning everything up. Then it was on to installing the baseboard, quarter round, and window molding…
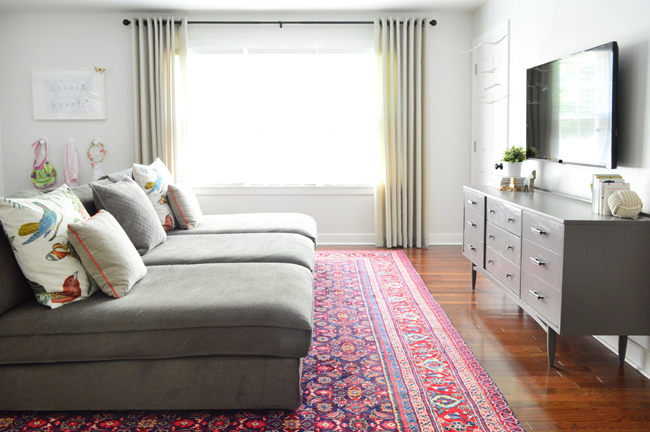
…and then adding those built-ins…
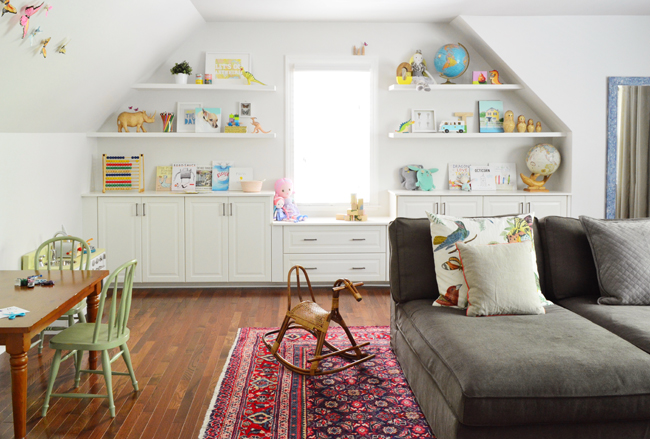
… and finally just filling the room up to create the bonus room we now know and love. And use every single day. Especially the Mega Sofa-Thing. I treated myself to quite the impressive Father’s Day nap there on Sunday.
So if you’re about to undertake a hardwood floor installation, just ready yourself for some heavy box hauling, tedious hand-nailing, and exhilarating mallet smacking. Optional addition: some obnoxious ’90s pop song shout-singing (HEYYYYY MACARENA).
Psst- This week’s podcast episode is live. You can find it on iTunes, Google Play, TuneIn Radio, Pocket Casts, or Stitcher (click here if you’re a podcasting newbie and we’ll help you figure it all out). We’re talking about how our mornings got greener, what move-related happening has Sherry giddy, and we get a phone call from one of our favorite Canadian designers. We also discuss the design mistake that we’ve made TWICE, dive into why decluttering can make your head hurt, & talk about what has changed about our frame game.
The post How To Install Hardwood Flooring appeared first on Young House Love.
No comments:
Post a Comment