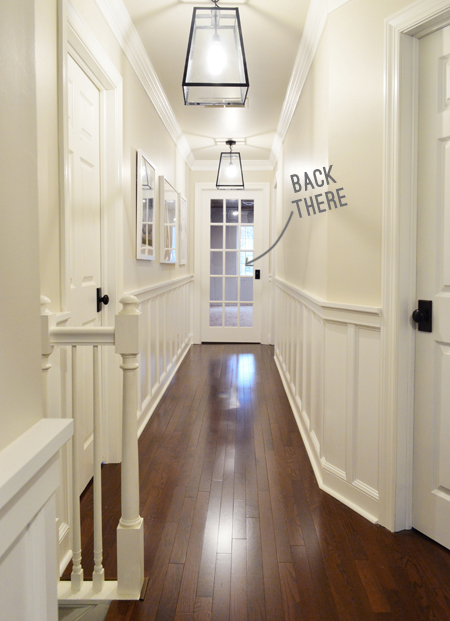
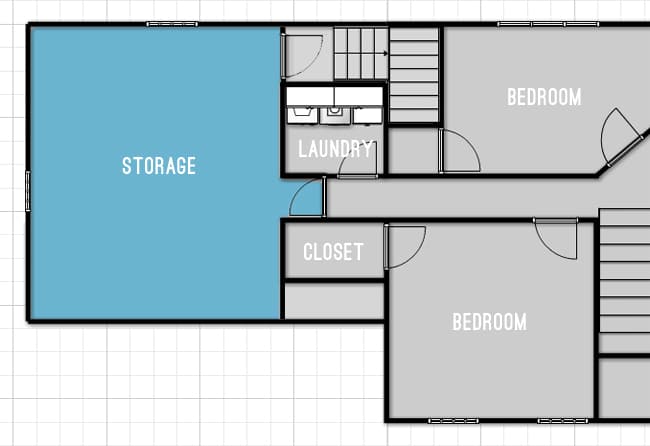
Who remembers our old furniture and pillow hoarding room at the end of the hall that we used to call “the storage room”? You may recall that we stole a bit of its square footage to create our laundry room), which conveniently left us with a more rectangular shaped room and easier access via the new glass door that we installed at the end of the hallway.
And if you follow us on Instagram or Facebook, you already know that it has been undergoing a bit of a transformation lately…
First, some background. We knew this room would someday become a great bonus space for us. Many of our neighbors’ homes had their above-the-garage area finished from the get-go, but for some reason ours only got framing and HVAC (which we kept turned off in there to avoid heating/cooling a room with no insulation). So for a few years, it was just a spot where we corralled things like seasonal decorations, yet-to-be-used furniture, and my wife’s collection of 10,000 maniacs pillows. OK, that might be a slight exaggeration, there may have only been 5,000.
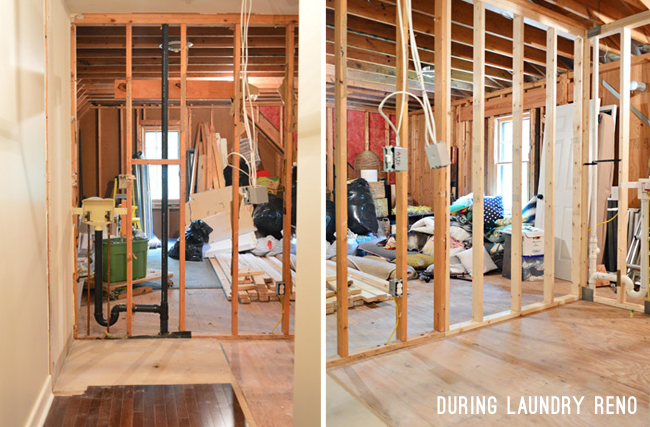
Looking back, we realized we never showed very much of this room because, well, there wasn’t much to show. You get a good-but-dark view of it during this house tour video (around the 3:10 mark) and you caught a few glimpses of it during our laundry reno posts. Mostly it looked like the room where you might inexplicably find that single shoe you’ve been missing for the last twelve months or a half-eaten box of old raisins. In other words: super organized.
When we moved in, turning it into a legit room was pretty low on our to-do list, figuring we wouldn’t need it until our kids (well, kid at the time) grew and could use it more as an independent playing/movie-night/sleepover-hosting space. But as the years rolled by (and our child count doubled, along with a bunch of our friends’ broods) we realized that 360 finished square feet would be a lot more useful than “an almost-finished room to hoard ALL THE PILLOWS” (besides, Sherry still has our walk-up attic for that). We think it’ll be handy for art/homework/playing/movie nights & spillover sleeping space for all of our friends & family with more than one kid (that’s all our guest room really fits comfortably).
So late last year we began the process of turning the unfinished storage space into a finished room. It was all pretty straightforward – get some of the electrical updated, add insulation & drywall, install flooring/trim/baseboard, then paint – and voila! Here’s the closest thing I dug up to a “before” which was taken while we were using it as a painting space for our hallway wainscoting project.
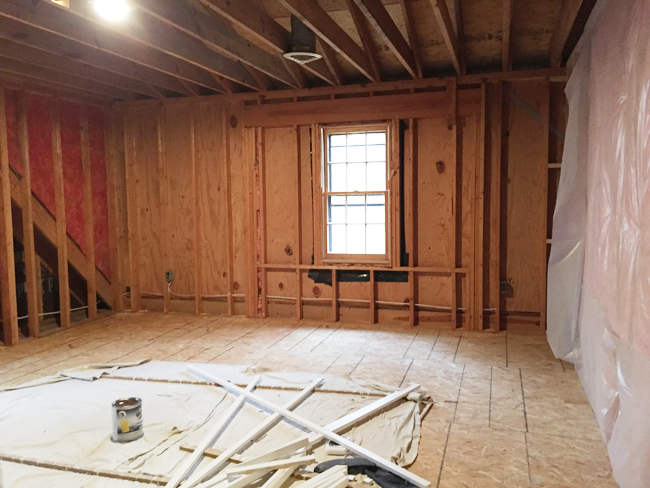
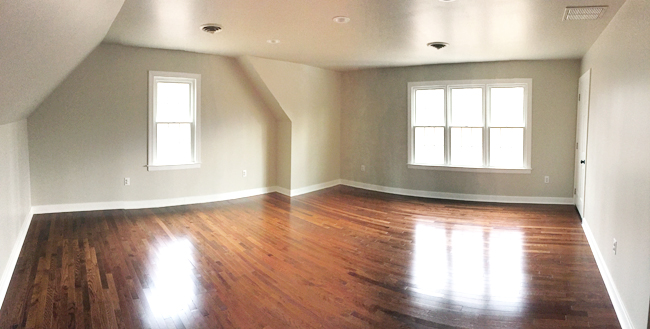
First we had our go-to electrician add outlets and recessed lights (which is a lot faster/less expensive when there’s no drywall), and we hired a local window company to convert an existing single window into a triple window to let in a lot more light. As you can see in the photo above, it was already framed with the necessary header for a larger window – making it a pretty simple switch (the exterior here is one of our few spots of siding, so no brick work was necessary either). Excuse the bowing in some of these pics – we just used the panoramic feature on our iPhones.
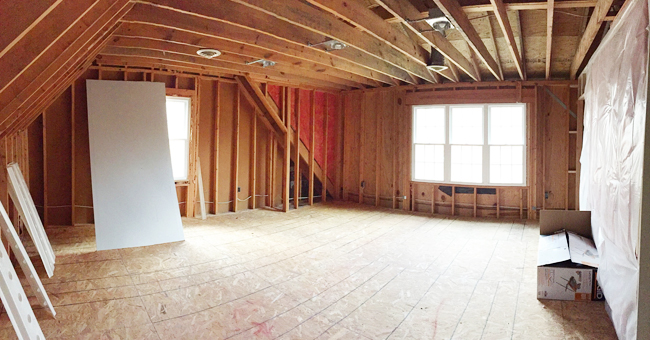
We considered doing the drywall ourselves, but it’s a not a task we particularly enjoy or are particularly fast at (drywalling and mudding the laundry room was fine, but this is roughly 6X bigger). So we found a local pro (the window guy’s cousin, actually) who came in with two other guys and knocked it all out in three days for us. Best. Decision. Ever.
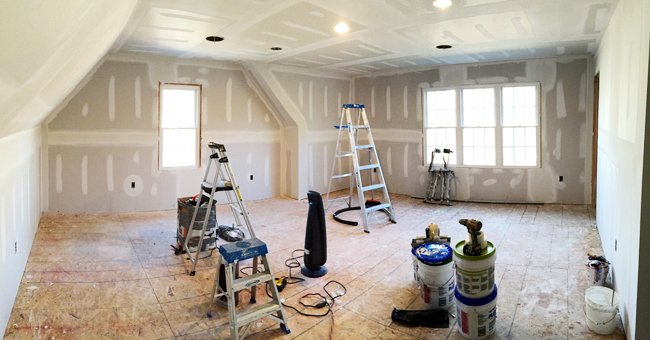
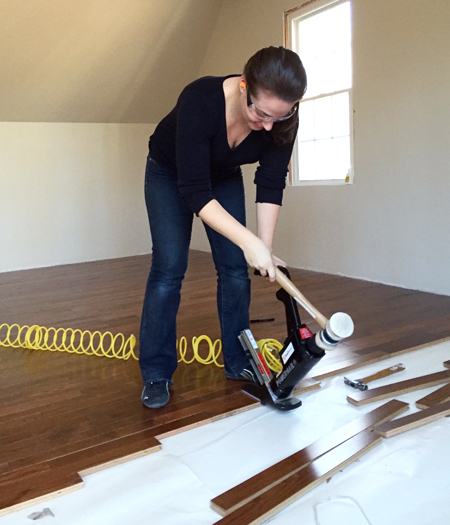
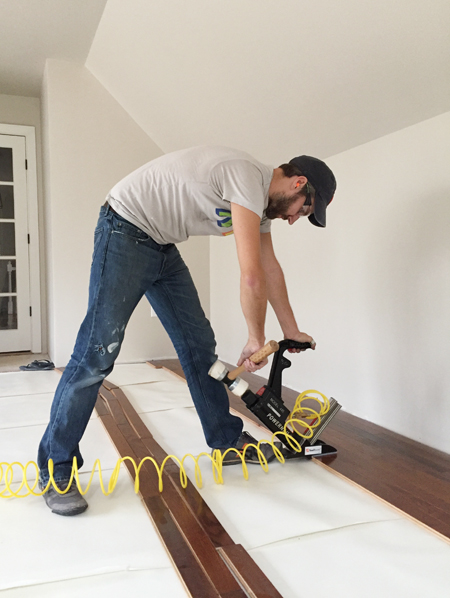
That just left us with flooring and finishing (priming & painting, installing trim & baseboards, and then the obligatory twirling around in the finished space like a Disney character). After considering wall-to-wall carpeting, we opted to continue the same oak hardwood flooring that goes throughout the rest of the upstairs. Since you see it down the hallway, we thought the flow would be nice and it would make the room feel like it was always finished (as opposed to an add on). We’ll just put down a nice big area rug to cozy things up.
Lucky for us, this room wasn’t cursed with the same particle board subfloor that the rest of our house’s second floor had (which required a floating hardwood installation). Regular plywood subfloor meant we could try our hand at a more traditional nail-down installation, which ended up being weirdly fun. I’ll try to share some tips on what we learned in another post.
You can see that we painted the walls before installing the floor, using the same color that’s in the hallway (Edgecomb Gray by Benjamin Moore), and then it was just a matter of adding baseboards and trimming out the windows. Although by this time the kids were so excited to see it come together that they couldn’t have cared less about what the windows looked like.
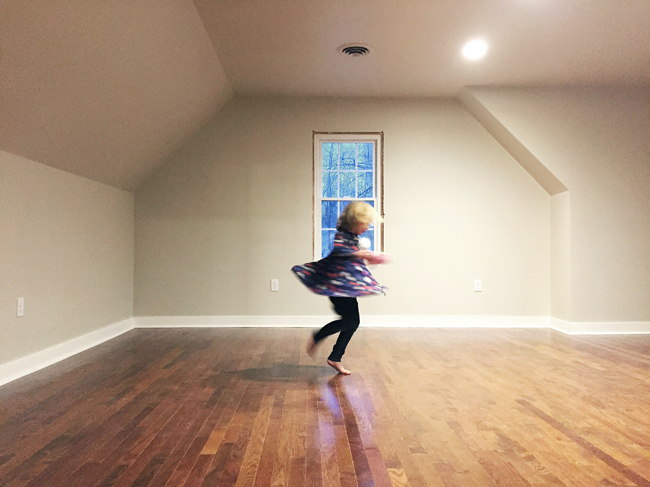
Now we’re in the process of filling it in. As much fun as a big empty room without any furniture is (and believe me, we were briefly tempted to leave it like that for sheer running/jumping/”GET SOME ENERGY OUT KIDS!” stuff) we know it’ll serve us even better with actual things in it.
We’re planning to take it slow on the decor front: bringing in a few already-owned furniture pieces, relocating a few existing toys, and adding a hand-me-down craft table for the kids (you know, as opposed to buying a bunch of new things to fill it up right away – just so we can see how we naturally use the space). Although we do have a plan for that recessed/sloped area around the single window, and we’ve already bought a Craigslist piece that we’re breathing some new life into. We hope to drop back in with more details when it comes together a little more, but until then just picture the kids (Burger included) running laps and laughing/barking loudly while their voices echo off the freshly hung walls.
Psst- We finally created this Shop Our House page to help you hunt down any furniture/accessories that you see in our house, along with our paint colors (only took us 2.5 years!).
No comments:
Post a Comment